Let’s be honest, we’ve all been there. You’ve made a magnificent batch of soup, a flavorful marinade, or a rich broth, and you want to preserve it. You reach for your trusty vacuum sealer, envisioning perfectly portioned, freezer-burn-free packages. But then, disaster strikes. The machine starts to pull, and before you can hit “cancel,” a torrent of liquid gets sucked up into the drip tray, or worse, into the motor itself. It’s a messy, frustrating experience that can make you want to give up entirely. But what if I told you there’s a foolproof way to do it? Learning how to seal liquids with a vacuum sealer is a game-changer for meal prep and food preservation, and I’m here to walk you through it, step by simple step.
Why Is Sealing Liquids So Tricky, Anyway?
First, let’s understand the “why” behind the mess. Your standard external (or “edge”) vacuum sealer is designed to do one thing brilliantly: suck air out of a bag and then apply heat to seal it shut. The problem is, the machine isn’t smart enough to distinguish between air and, say, your prize-winning tomato bisque. When it creates that powerful vacuum, it pulls on everything inside the bag. Air is light and comes out easily. Liquids, on the other hand, get pulled right along with it, creating what I like to call a “kitchen-pocalypse.”
Expert Insight from Chef Isabella Rossi: “The fundamental mistake people make is treating liquids the same as solids. A vacuum sealer’s suction is indiscriminate. The secret isn’t a fancier machine; it’s a smarter technique. Changing the state of the liquid from fluid to solid before sealing is the cornerstone of professional food preservation in any kitchen.”
This is precisely why mastering how to seal liquids with a vacuum sealer is less about the machine and more about the method.
The Golden Rule: Freezing is Your Best Friend
What’s the single most effective, no-fail method for sealing liquids? Freeze them first. By turning your liquid into a solid block of ice, you eliminate the problem entirely. The vacuum sealer can then remove the air from around the solid block without ever pulling a single drop of liquid into its delicate mechanics. It’s simple, clean, and incredibly effective. Keeping the internal components of your machine dry and clean is a crucial part of its upkeep. For a deeper dive into maintenance, understanding how to extend vacuum sealer lifespan provides essential tips that go hand-in-hand with proper usage.
Step-by-Step Guide: How to Seal Liquids with a Vacuum Sealer
Ready to become a liquid-sealing pro? Follow these simple steps for a perfect, mess-free seal every time.
- Cool It Down: Never, ever try to freeze or seal hot liquids. It’s inefficient and can be a food safety hazard. Let your soup, sauce, or broth cool completely to room temperature first.
- Portion It Out: Ladle the liquid into the container you’ll use for freezing. You have a few great options here:
- Directly in the Bag: Pour the liquid directly into the vacuum sealer bag, leaving at least 3-4 inches of headspace at the top. You’ll need this extra room to get a good seal. You can stand the bags upright in a loaf pan or a narrow container to prevent spills in the freezer.
- Molds or Containers: Use silicone soup molds, ice cube trays (for small portions of broth or pesto), or any freezer-safe container. This is my preferred method as it creates perfectly uniform blocks that are easy to handle.
- The Pre-Freeze: Place the bags or containers in the freezer. You don’t have to wait for them to be frozen rock-solid, though that works perfectly. Freezing them for 1-2 hours until they are slushy or mostly solid is often enough to prevent any liquid from being sucked up. The goal is simply to stop it from being fluid.
- Transfer and Seal: Once your liquid is solid, pop the frozen block out of its mold and place it into a vacuum sealer bag (if you didn’t freeze it in the bag already). Now, you can seal it just like you would a piece of steak or a block of cheese. The machine will pull the air out from around the solid block, giving you a perfect, airtight seal.
- Label and Store: Always label your bags with the contents and the date. You might think you’ll remember that dark red block is bolognese sauce and not chili, but a few months from now, you’ll be glad you labeled it!
Alternative Methods for Sealing Liquids
While pre-freezing is the gold standard, there are a couple of other tricks you can use, especially if you’re in a hurry or sealing something with just a bit of moisture, like a marinade.
The Partial Freeze Method (The Slushy)
This is a time-saving version of the full freeze. Let your liquid freeze for just long enough to become a thick, icy slush. This consistency is often solid enough to resist the vacuum’s pull, allowing you to get a seal before any liquid reaches the chamber. It takes a bit of practice to get the timing right, but it’s a great option.
The Paper Towel Trick (A Liquid Barrier)
For foods with a bit of moisture, like marinated meats or juicy fruits, you can create a simple barrier. Fold a small strip of paper towel and place it inside the bag, between the food and where the seal will be. The paper towel will absorb any minor liquid that gets pulled up, stopping it from reaching the sealing mechanism. Use this with caution and only for small amounts of liquid.
|
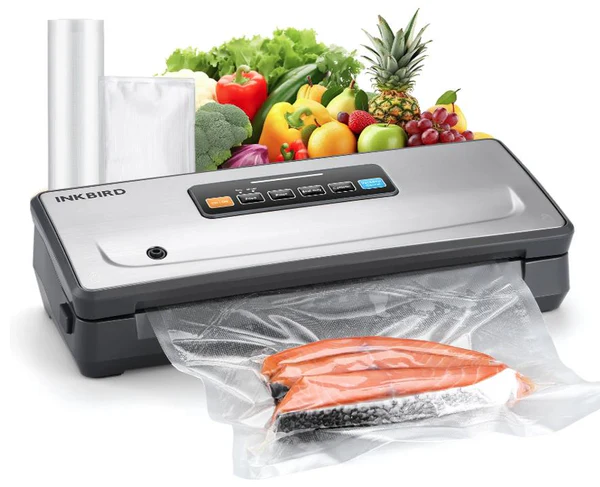
Our Picks for the Best Food Vacuum Cealer in 2026
As an Amazon Associate, we earn from qualifying purchases.
|
||
| Num | Product | Action |
|---|---|---|
| 1 | Vacuum Sealer Machine Powerful 90Kpa Precision 6-in-1 Compact Food Preservation System with Cutter, 2 Bag Rolls & 5 Pre-cut Bags, Widened 12mm Sealing Strip, Dry&Moist Modes (Silver) |

|
| 2 | SEATAO VH5188 Automatic Vacuum Sealer Machine, 90kPa Multifunction Commercial Vacuum Food Sealer For Food Preservation, Dry & Moist & Food & Extended Modes, LED lights, Double Seal |
|
| 3 | FoodSaver Vacuum Sealer Machine, Automatic Bag Detection, Sous Vide Friendly, with sealer bags, roll, handheld vacuum sealer, black |
|
| 4 | Nesco Deluxe Food VS-12 Vacuum Sealer, 130 Watts, Kit Bags & Viewing Lid, Compact, Silver |
|
| 5 | FoodSaver V4400 2-in-1 Vacuum Sealer Machine with Automatic Vacuum Sealer Bag Detection and Starter Kit |
|
| 6 | Chef Preserve Compact Vacuum Sealer for Food (Vacuum Sealer Machine + 30 Reusable Vacuum Bags) Powerful Handheld Vacuum Sealer Machine, Seal Meal Saver, Portable Food Sealer |
|
| 7 | NutriChef Automatic Vacuum Air Sealing System for Food Preservation with Starter Kit, Compact Design, Lab Tested, Dry & Moist Food Modes with Led Indicator Lights, Black |
|
| 8 | Vakumar Liquid Vacuum Sealer Machine, 90Kpa Vacuum Sealer Machine Preservation Dry/Moist/Liquid Modes, LED Indicator Light, Handle Locked Design, Built-in Cutter and Bag Storage, Removable Drip Tray |
|
| 9 |
|
|
| 10 | FoodSaver Compact Vacuum Sealer Machine with Airtight Bags and Roll - Ideal for Sous Vide and Airtight Food Storage, White |
|
Pro Tips for Flawless Liquid Sealing
Want to take your skills from good to great? Keep these professional tips in your back pocket.
- Always Leave Headspace: This is non-negotiable. You need at least 3-4 inches of empty space at the top of the bag. This gives you room to work and ensures no liquid is near the heat-sealing strip.
- Wipe the Seal Area: Before you seal, give the inside and outside of the bag’s opening a quick wipe with a paper towel. Any grease, moisture, or food particles can compromise the seal.
- Use the “Moist” Setting (If You Have It): Many vacuum sealers have a “moist” food setting. This function typically uses a less powerful vacuum and a longer sealing time to create a more secure seal on bags that might have a little moisture.
- Double Seal for Security: For long-term freezer storage, I always recommend using the “Seal” button to create a second seal about a quarter-inch away from the first one. It’s extra insurance against any potential leaks.
- Keep Your Machine Clean: A clean machine is a happy machine. After any sealing session, especially with liquids, it’s good practice to wipe down the drip tray. Learning about some eco friendly vacuum sealer cleaning tips can also help you maintain your appliance in a sustainable way.
What Liquids Can You Actually Vacuum Seal?
Knowing how to seal liquids with a vacuum sealer also means knowing what you can and can’t seal for optimal results.
- Excellent for Sealing:
- Soups, stews, and chilis
- Broths and stocks
- Sauces (pasta sauce, curry, pesto)
- Marinades (for sous vide or freezing with meat)
- Baby food purées
- Smoothies for quick breakfasts
- Seal with Caution:
- Dairy-Based Soups/Sauces: Cream-based liquids can sometimes separate when frozen and thawed. They are still perfectly safe and edible, but the texture might change slightly.
- Carbonated Liquids: Never attempt to vacuum seal carbonated drinks. The process will remove the carbonation, and the pressure changes can be unpredictable.
Frequently Asked Questions (FAQ)
Can I vacuum seal hot liquids?
No, you should never seal hot liquids. For one, it creates a food safety risk by trapping the food in the “danger zone” (40-140°F or 4-60°C) where bacteria can grow. Secondly, the steam can interfere with the seal and potentially damage your machine. Always cool liquids to at least room temperature first.
What happens if I accidentally suck liquid into my vacuum sealer?
Stop the machine immediately and unplug it. Remove the drip tray and wash it thoroughly. Check your user manual, but generally, you should use a damp cloth to carefully clean any liquid you can see inside the machine. Let it air dry completely for at least 24 hours before trying to use it again.
Do I need special bags for sealing liquids?
You don’t need special bags, but high-quality, multi-layer bags are always recommended. They are more durable, less prone to punctures in the freezer, and will provide a more reliable seal than thinner, cheaper alternatives.
How long will vacuum-sealed liquids last in the freezer?
Properly vacuum-sealed liquids can last for 1-2 years in the freezer without suffering from freezer burn, compared to just a few months in a standard container or zip-top bag. The flavor, color, and nutritional value will be significantly better preserved.
Is this method good for sous vide cooking?
Absolutely! The pre-freezing method is perfect for preparing marinades with proteins for sous vide. You can portion out a chicken breast with its marinade, freeze it solid, and then vacuum seal it. It goes straight from the freezer to the sous vide bath, making for an incredibly flavorful and convenient meal.
Your Kitchen, Your Rules
Mastering how to seal liquids with a vacuum sealer opens up a whole new world of kitchen efficiency. It transforms your freezer into a library of ready-to-go meals, sauces, and stocks, saving you time, money, and a whole lot of food waste. The initial fear of a liquid-filled disaster is replaced by the confidence of a foolproof technique. So go ahead, make that giant pot of soup. With the power of pre-freezing, you’re ready for anything.