Let’s be real for a moment. How much food have you thrown out this month? That half-eaten block of cheese that went fuzzy, the steak that got a nasty case of freezer burn, or the fresh berries that turned to mush in three days? It’s frustrating, and it adds up. But what if I told you there’s a simple, affordable kitchen gadget that can stop this waste in its tracks? I’m talking about finding the Best Vacuum Sealer Under 100 dollars. You don’t need to shell out a fortune to get a machine that dramatically extends the life of your groceries, saves you money, and frankly, makes you feel like a kitchen superhero. Stick with me, and I’ll break down everything you need to know to pick the perfect budget-friendly model for your home.
What Exactly Does a Vacuum Sealer Do?
So, how does this magic work? In short, a vacuum sealer removes the air from a specially designed bag or container before sealing it shut, creating an airtight environment for your food.
Think of it this way: the two biggest enemies of fresh food are oxygen and moisture. Oxygen feeds the tiny microorganisms that cause food to spoil and decay. It also causes oxidation, which is why your sliced apples turn brown. A vacuum sealer sucks that enemy right out of the equation. By removing the air, you essentially press the “pause” button on the spoiling process. This simple action can extend the shelf life of food by up to five times longer than traditional storage methods. No more icy, flavorless chicken from the back of the freezer!
The Two Main Players: Types of Vacuum Sealers
When you start shopping, you’ll mainly see two types of machines. For our budget, we’re really only focused on one, but it’s good to know the difference.
External “Edge” Sealers
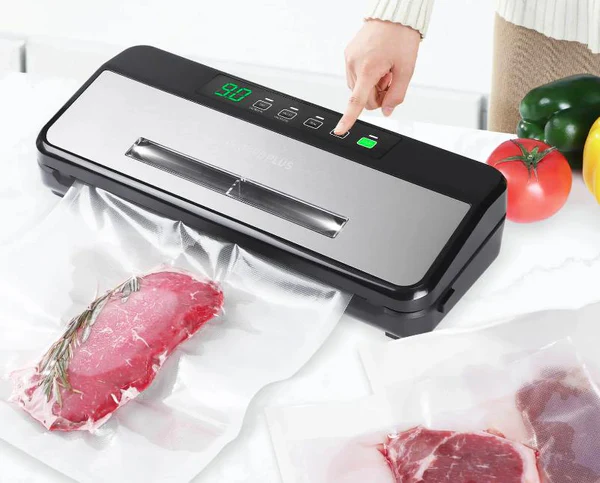
This is the kind you’ll almost certainly be getting for under $100. They’re compact, sit on your countertop, and are incredibly user-friendly. You place the open end of your food-filled bag onto a sealing strip, close the lid, and the machine sucks the air out from the opening before heat-sealing it shut. They’re perfect for everyday home use, from sealing leftovers to prepping meals for the week.
Chamber Sealers
These are the big, bulky, professional-grade machines you might see in a restaurant kitchen. With these, you place the entire bag inside a chamber, and the machine removes air from the whole chamber at once. This allows you to seal liquids like soups and marinades without any mess. They are fantastic, but they also cost a small fortune and take up a ton of space. We’ll admire them from afar for now!
How Do You Use a Vacuum Sealer? A Simple Guide
Wondering how to get started? It’s easier than you think. Using a typical external vacuum sealer is a straightforward process that you’ll master in minutes.
- Prepare Your Food: Make sure your food is cool and as dry as possible. If you’re sealing something sharp like bone-in meat, you might want to wrap the sharp edge with a small piece of paper towel to prevent it from puncturing the bag.
- Grab a Bag: Use a vacuum sealer bag or roll and cut it to the size you need. Make sure you leave at least three inches of extra space at the top—this “headspace” is crucial for getting a good seal.
- Place and Position: Place your food inside the bag. Then, lay the open end of the bag flat across the sealing bar inside your machine. Most models have clear guides to show you exactly where it should go.
- Lock and Load: Close the lid of the vacuum sealer. You’ll usually hear a “click” on both sides to let you know it’s securely locked.
- Press the Button: Hit the “Vacuum & Seal” button. The machine will whir to life, sucking all the air out. You’ll literally see the bag shrink tightly around your food. Once all the air is removed, the machine will automatically heat-seal the bag.
- Check Your Work: Once the machine is finished, release the lid. Inspect the seal—it should be a clear, solid line with no wrinkles or gaps. That’s it! Your food is now ready for the fridge, freezer, or pantry.
Pro Tips for a Perfect Seal Every Time
After sealing thousands of bags over the years, I’ve learned a few tricks that make a world of difference, especially with a budget machine.
- The Pre-Freeze Trick: For anything moist or liquidy—like ground meat, soups, or marinated chicken—pop it in the freezer for an hour or two before sealing. This solidifies the liquid, preventing it from getting sucked into the machine and ruining the seal. This is the single most important tip I can give you.
- Give it a Double: For long-term freezer storage or for sous vide cooking, I always double-seal the bag. Just make a second seal about a quarter-inch away from the first one. It’s a little extra insurance that costs you nothing.
- Wipe it Down: Make sure the open end of the bag is clean and completely dry before you try to seal it. Any grease, moisture, or food particles can prevent a proper, airtight seal.
- The Paper Towel Barrier: Sealing something particularly juicy? Fold a small paper towel and place it inside the bag, just below where you plan to seal. It acts as a trap, absorbing any excess moisture before it can reach the sealing area.
|
Our Picks for the Best Food Vacuum Cealer in 2026
As an Amazon Associate, we earn from qualifying purchases.
|
||
| Num | Product | Action |
|---|---|---|
| 1 | Chef Preserve Compact Vacuum Sealer for Food (Vacuum Sealer Machine + 30 Reusable Vacuum Bags) Powerful Handheld Vacuum Sealer Machine, Seal Meal Saver, Portable Food Sealer |

|
| 2 | Vakumar Liquid Vacuum Sealer Machine, 90Kpa Vacuum Sealer Machine Preservation Dry/Moist/Liquid Modes, LED Indicator Light, Handle Locked Design, Built-in Cutter and Bag Storage, Removable Drip Tray |
|
| 3 | Vacuum Sealer Machine Powerful 90Kpa Precision 6-in-1 Compact Food Preservation System with Cutter, 2 Bag Rolls & 5 Pre-cut Bags, Widened 12mm Sealing Strip, Dry&Moist Modes (Silver) |
|
| 4 | SEATAO VH5188 Automatic Vacuum Sealer Machine, 90kPa Multifunction Commercial Vacuum Food Sealer For Food Preservation, Dry & Moist & Food & Extended Modes, LED lights, Double Seal |
|
| 5 | FoodSaver Compact Vacuum Sealer Machine with Airtight Bags and Roll - Ideal for Sous Vide and Airtight Food Storage, White |
|
| 6 | FoodSaver Vacuum Sealer Machine, Automatic Bag Detection, Sous Vide Friendly, with sealer bags, roll, handheld vacuum sealer, black |
|
| 7 | Nesco Deluxe Food VS-12 Vacuum Sealer, 130 Watts, Kit Bags & Viewing Lid, Compact, Silver |
|
| 8 |
|
|
| 9 | NutriChef Automatic Vacuum Air Sealing System for Food Preservation with Starter Kit, Compact Design, Lab Tested, Dry & Moist Food Modes with Led Indicator Lights, Black |
|
| 10 | FoodSaver V4400 2-in-1 Vacuum Sealer Machine with Automatic Vacuum Sealer Bag Detection and Starter Kit |
|
What Foods Can You Vacuum Seal? (And What to Avoid)
A vacuum sealer is incredibly versatile, but it’s not meant for everything. Knowing what to seal and what to skip is key to getting the best results.
The “Yes” List: Go for It!
- Meats, Poultry, and Fish: This is the #1 reason many people buy a sealer. Say goodbye to freezer burn and enjoy fresh-tasting meat for months.
- Hard Cheeses: Vacuum sealing prevents mold and keeps your cheese from drying out.
- Dry Goods: Coffee beans, nuts, flour, and pasta stay fresher for much longer when protected from air and moisture.
- Blanched Vegetables: For veggies like broccoli, green beans, and asparagus, it’s best to blanch them (a quick boil followed by an ice bath) before freezing and sealing. This stops enzymes that can degrade their flavor and texture.
- Prepped Meals & Leftovers: Perfect for meal prepping or saving last night’s dinner for another day.
As Dr. Amelia Thorne, a food preservation specialist, often says, “The key to successfully preserving vegetables is to deactivate the enzymes before freezing. Blanching is a non-negotiable step if you want your vacuum-sealed produce to taste great months later.”
The “No-Go” List: Think Twice
- Soft Cheeses: Delicate cheeses like brie or goat cheese will get crushed by the vacuum pressure.
- Raw Cruciferous Vegetables: Things like raw broccoli, cabbage, and cauliflower release gases as they sit. In an airtight bag, this gas can cause the bag to expand and the food to spoil. Always blanch them first!
- Garlic & Onions: In an oxygen-free environment, these can create a risk for botulism bacteria. It’s safer to store them using other methods.
- Mushrooms: Raw mushrooms decay quickly in a low-oxygen environment. It’s better to cook them first, then seal.
Finding the Best Vacuum Sealer Under 100: What to Look For
Okay, you’re ready to buy, but what features actually matter on a budget model? Here’s what to keep an eye on to ensure you get the best vacuum sealer under 100.
Suction Power
This is the heart of the machine. You want a sealer with consistent, reliable suction. You don’t need the most powerful motor on the market, but you need one that can effectively remove the air from the bag every time. Look at user reviews to see what people say about its performance over time.
Sealing Strip Quality
The heat strip is what creates the seal. A wider strip (3mm vs. 1-2mm) generally provides a more secure, durable seal. Also, check if the machine has a non-stick coating, which makes cleaning easier.
Ease of Use & Cleaning
Look for a machine with simple, one-touch controls. Buttons for “Vacuum & Seal,” “Seal Only,” and “Cancel” are pretty standard and all you really need. A removable drip tray is also a huge plus, making cleanup a breeze if any liquid does get pulled from the bag.
Bells and Whistles (That Are Actually Useful)
- Dry/Moist Food Settings: This feature adjusts the sealing time. The “moist” setting gives the heat strip a little more time to work through any potential moisture, ensuring a solid seal.
- Built-in Bag Cutter & Storage: Many models come with a handy roll storage compartment and a slide cutter. This makes cutting custom-sized bags incredibly quick and easy.
- Accessory Port: This allows you to use a hose attachment to seal special canisters or wine stoppers, adding to the machine’s versatility.
Frequently Asked Questions About Budget Vacuum Sealers
Can you reuse vacuum sealer bags?
Yes, you can! As long as the bag previously held something like bread or dry goods. Just wash it thoroughly with soap and hot water and let it dry completely. I would not recommend reusing bags that held raw meat, fish, or greasy foods.
Is a vacuum sealer under 100 powerful enough for regular use?
Absolutely. For the average household’s needs—sealing bulk meat purchases, preserving leftovers, and meal prepping—a quality model in this price range has more than enough power to get the job done reliably.
What’s the main difference between a cheap and an expensive vacuum sealer?
The biggest differences are usually build quality, motor power/speed, and extra features. More expensive models might have dual heat-sealing strips, faster vacuum cycles, and more robust construction. But a good budget model will still create a perfectly safe and effective seal.
Do I have to use the expensive brand-name bags?
Not usually. Most external vacuum sealers can use any brand of textured or embossed vacuum sealer bags. You can often find generic brand rolls online for a fraction of the price, which makes your long-term costs even lower.
How long does vacuum-sealed food actually last in the freezer?
Compared to standard zipper bags where food might last 6-12 months before getting freezer burn, properly vacuum-sealed food can last for 2-3 years in the freezer while maintaining its quality, flavor, and texture.
Your Journey to Less Waste Starts Now
There you have it. Investing in a vacuum sealer is one of the smartest, most practical decisions you can make for your kitchen. It’s not just about preventing freezer burn; it’s about fundamentally changing how you shop, cook, and manage your food. It empowers you to buy in bulk, take advantage of sales, and ensure that the food you buy actually ends up on your plate, not in the trash.
With the information in this guide, you are now fully equipped to cut through the marketing jargon and find a reliable machine that fits your needs. Proving that finding the best vacuum sealer under 100 is not only possible but is a fantastic step toward a more efficient and less wasteful kitchen. Now go on and start sealing! I’d love to hear about your first vacuum-sealing success story.