Let’s be honest, throwing away spoiled food feels like tossing cash straight into the garbage bin. We’ve all been there: you buy fresh berries on Monday, and by Friday, they’re a sad, fuzzy science experiment. Finding the Best Vacuum Sealer Under 200 dollars is your secret weapon in the war against waste, and I’m here to show you how this one simple kitchen gadget can completely revolutionize the way you store food, save money, and prep meals. It’s not just about freezing meat; it’s about locking in freshness, flavor, and nutrients for weeks, months, or even years. Ready to become a food preservation pro? Let’s dive in.
How Does a Vacuum Sealer Actually Work?
Ever wonder what the magic is behind vacuum sealing? It’s surprisingly simple science. The main culprit behind food spoilage is oxygen. It allows for the growth of mold, mildew, and bacteria. A vacuum sealer’s job is to kick oxygen out of the party.
Think of it this way: a vacuum sealer is like a bouncer for your food’s storage bag. It sucks all the air out, creating a near-airless environment, and then uses a heated strip to create an airtight seal. By removing the oxygen, you dramatically slow down the spoilage process and prevent freezer burn—that nasty, icy crystallization that ruins the texture and taste of your frozen foods. It’s like hitting the pause button on decay.
What Are the Common Types of Food Vacuum Sealers?
When you start shopping, you’ll mainly see two types. For our budget, we’re focused on one, but it’s good to know the difference.
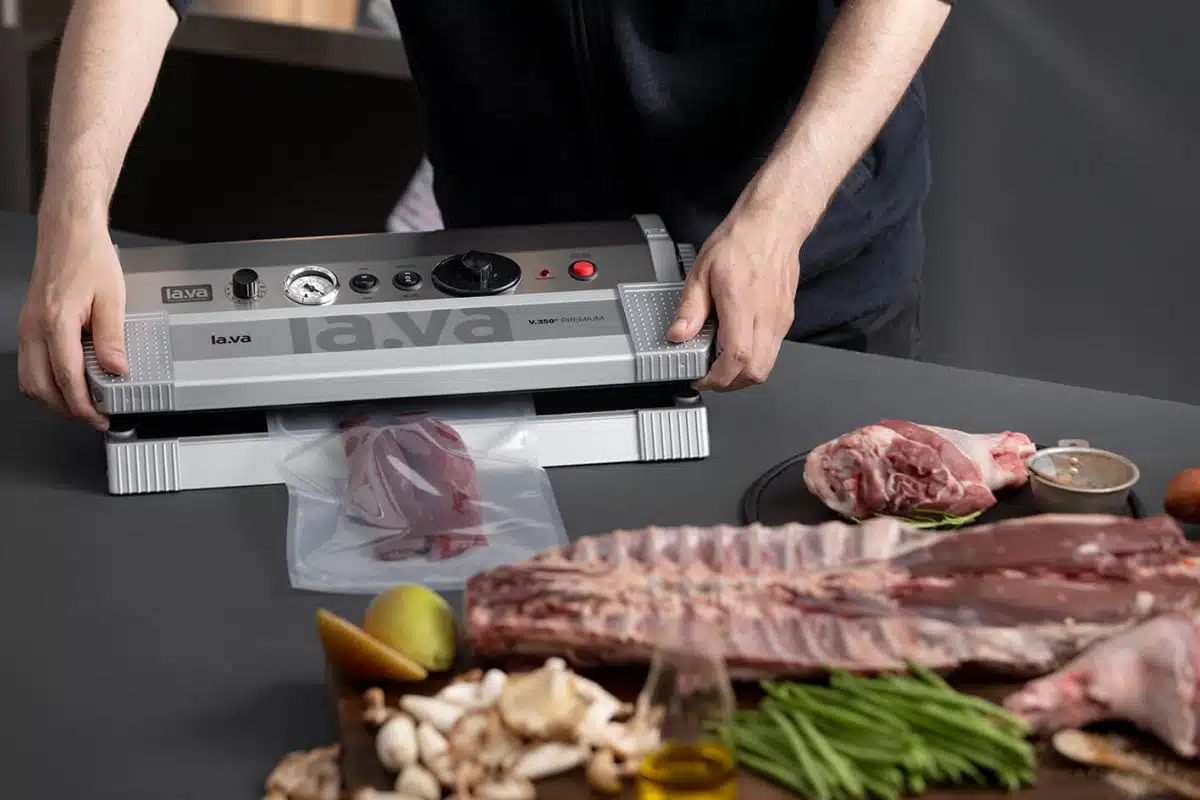
External (or “Clamp-Style”) Vacuum Sealers
This is the most common and affordable type, and it’s where you’ll find the best vacuum sealer under 200. You place the open end of a specially designed, textured bag into the machine’s channel, close the lid, and the machine vacuums the air out from outside the bag before sealing it. They’re compact, easy to use, and perfect for home kitchens.
Chamber Vacuum Sealers
These are the heavy-duty, commercial-grade cousins. You place the entire bag inside a chamber, and the machine removes air from the whole chamber, which allows you to seal liquids like soups and marinades without making a mess. They are fantastic but typically cost well over our $200 budget.
How Do I Use a Vacuum Sealer? A Step-by-Step Guide
Getting started is a breeze. While every model is slightly different, the basic process is universal. Here’s a simple breakdown to get you sealing like a pro in minutes.
- Prepare Your Food: Wash and thoroughly dry your food. For liquids or very moist items like ground meat, it’s a good idea to pre-freeze them on a baking sheet for an hour or two. This prevents liquid from being sucked into the machine.
- Choose Your Bag: Use a roll to create a custom-sized bag or grab a pre-sized one. Make sure you leave at least three inches of extra space at the top for a proper seal.
- Fill the Bag: Place your food inside, trying to keep it in a single, flat layer if possible for even freezing and easier storage. Pro-tip: Fold the top edge of the bag outward before filling to keep the sealing area clean and dry.
- Position the Bag: Open the lid of your vacuum sealer and place the open end of the bag flat into the vacuum channel or drip tray, making sure it’s past the sealing bar.
- Lock and Seal: Close the lid firmly until it clicks or locks into place. Press the “Vacuum & Seal” button. The machine will whir to life, sucking the air out. You’ll literally see the bag shrink-wrap around your food.
- Release and Inspect: Once the indicator light shows the cycle is complete, unlock the lid. Check the seal—it should be clear, flat, and have no wrinkles or gaps. If it’s not perfect, simply cut it off and try again.
Tips and Tricks for Perfect Sealing Every Time
After years of using these machines, I’ve picked up a few tricks that make a huge difference.
- Double Seal for Security: For long-term freezer storage or for sealing liquids, run a second seal cycle just above the first one. It’s a little bit of extra insurance.
- The Paper Towel Trick: Sealing something moist like a steak or fish fillet? Fold a small paper towel and place it inside the bag, between the food and the seal area. It will absorb any excess moisture before it can interfere with the seal.
- Blanch Your Veggies: For vegetables like broccoli, cauliflower, and cabbage, it’s crucial to blanch them first. These veggies release gases that can cause the bag to expand and break the seal over time. A quick dip in boiling water followed by an ice bath solves the problem.
- Protect from Punctures: If you’re sealing items with sharp edges, like bones or pasta, wrap them in a paper towel or a small piece of parchment paper before placing them in the bag to prevent punctures.
- Label Everything: You’d be surprised how similar a frozen pork chop and a frozen chicken breast can look. Use a permanent marker to write the contents and the date on every bag before you seal it. You can learn more about proper food storage with [our complete guide to freezer organization].
|
Our Picks for the Best Food Vacuum Cealer in 2026
As an Amazon Associate, we earn from qualifying purchases.
|
||
| Num | Product | Action |
|---|---|---|
| 1 | FoodSaver Vacuum Sealer Machine, Automatic Bag Detection, Sous Vide Friendly, with sealer bags, roll, handheld vacuum sealer, black |

|
| 2 | Nesco Deluxe Food VS-12 Vacuum Sealer, 130 Watts, Kit Bags & Viewing Lid, Compact, Silver |
|
| 3 | Vacuum Sealer Machine Powerful 90Kpa Precision 6-in-1 Compact Food Preservation System with Cutter, 2 Bag Rolls & 5 Pre-cut Bags, Widened 12mm Sealing Strip, Dry&Moist Modes (Silver) |
|
| 4 | Chef Preserve Compact Vacuum Sealer for Food (Vacuum Sealer Machine + 30 Reusable Vacuum Bags) Powerful Handheld Vacuum Sealer Machine, Seal Meal Saver, Portable Food Sealer |
|
| 5 | NutriChef Automatic Vacuum Air Sealing System for Food Preservation with Starter Kit, Compact Design, Lab Tested, Dry & Moist Food Modes with Led Indicator Lights, Black |
|
| 6 | Vakumar Liquid Vacuum Sealer Machine, 90Kpa Vacuum Sealer Machine Preservation Dry/Moist/Liquid Modes, LED Indicator Light, Handle Locked Design, Built-in Cutter and Bag Storage, Removable Drip Tray |
|
| 7 | FoodSaver Compact Vacuum Sealer Machine with Airtight Bags and Roll - Ideal for Sous Vide and Airtight Food Storage, White |
|
| 8 | FoodSaver V4400 2-in-1 Vacuum Sealer Machine with Automatic Vacuum Sealer Bag Detection and Starter Kit |
|
| 9 | SEATAO VH5188 Automatic Vacuum Sealer Machine, 90kPa Multifunction Commercial Vacuum Food Sealer For Food Preservation, Dry & Moist & Food & Extended Modes, LED lights, Double Seal |
|
| 10 |
|
|
Foods You Should and Shouldn’t Vacuum Seal
A vacuum sealer is incredibly versatile, but it’s not meant for everything. Knowing what works and what doesn’t is key to success.
Perfect Candidates for Vacuum Sealing
- Meats and Poultry: Beef, chicken, pork, and fish stay fresh up to 5 times longer, completely free of freezer burn.
- Hard Cheeses: Prevents mold and keeps cheese from drying out.
- Dry Goods: Coffee beans, nuts, flour, and pasta are protected from moisture and pests.
- Prepped Meals: Perfect for meal prepping or storing leftovers for the week.
- Sous Vide Cooking: Vacuum sealing is an essential first step for [perfect sous vide cooking].
Foods to Avoid or Use Caution With
- Soft Cheeses: Cheeses like brie, ricotta, and blue cheese don’t hold up well, as the lack of oxygen can affect their texture and ripening process.
- Fresh Mushrooms: They can decay more quickly due to anaerobic bacteria. It’s better to cook them first, then seal.
- Raw Onions and Garlic: Like cruciferous veggies, they release natural gases that will cause the bag to fail.
- Whole Fresh Fruits: Sealing delicate fruits whole can crush them. It’s better to slice and pre-freeze.
As Chef Michael Beaumont, a farm-to-table advocate, always says, “A vacuum sealer doesn’t just preserve food; it preserves the peak moment of flavor. You’re capturing the essence of the harvest, whether it’s a summer tomato or a freshly caught fish, and saving it for a later day.”
How to Choose the Best Vacuum Sealer Under 200
Navigating the options can be tricky, but focusing on a few key features will help you find the perfect match for your kitchen needs.
| Feature | What to Look For | Why It Matters |
|---|---|---|
| Suction Power | Look for models with strong, consistent suction. A good motor ensures all the air is removed quickly and effectively. | Stronger suction means a better vacuum, tighter seal, and longer preservation time for your food. |
| Seal Bar | A wider seal bar (3mm or more) is generally better. Some models offer a double seal for extra security. | A wide, strong seal is less likely to fail, especially during long-term freezing or sous vide cooking. |
| Moist & Dry Modes | Having separate settings for different food types allows for a more customized and successful seal every time. | The moist setting uses a gentler vacuum and longer sealing time to handle moisture without compromising the seal. |
| Built-in Features | Onboard bag roll storage and a built-in cutter are huge convenience factors. They make the process much faster and neater. | No more fumbling with scissors or separate rolls of bags. Everything you need is in one place. |
| Ease of Cleaning | A removable drip tray is a must-have. It catches any stray liquids and can be tossed in the dishwasher. | Keeping your machine clean is essential for food safety and preventing cross-contamination. |
Frequently Asked Questions
Q: Can you reuse vacuum sealer bags?
A: Yes, you can! As long as the bag previously held non-greasy items like vegetables or bread, you can wash it thoroughly, dry it, and reuse it. Just cut off the old seal and make sure the bag is still long enough to reach the machine’s vacuum channel.
Q: What’s the main benefit of finding the best vacuum sealer under 200?
A: The primary benefit is massive savings on your grocery bill by drastically reducing food waste. It also protects food from freezer burn, locks in flavor and nutrients for longer, and is an invaluable tool for meal prepping and sous vide cooking.
Q: Do I need to use special bags for my vacuum sealer?
A: Yes, you do. External vacuum sealers require bags with textured or embossed channels on one side. These channels create tiny air pockets that allow the machine to successfully suck all the air out of the bag before sealing.
Q: How exactly does a vacuum sealer prevent freezer burn?
A: Freezer burn occurs when moisture on the surface of frozen food evaporates and then recrystallizes as ice. By removing virtually all the air, a vacuum sealer prevents this process from happening, keeping your food’s texture and taste intact.
Q: Is it worth investing in a kitchen appliance like this?
A: Absolutely. A quality vacuum sealer pays for itself quickly. By allowing you to buy in bulk, store leftovers safely, and prevent spoilage, the savings add up fast. It’s one of the most practical and cost-effective additions to any kitchen.
Your Next Step to a Fresher Kitchen
You’re now equipped with everything you need to know. From the science behind it to the practical tips for everyday use, you can confidently take control of your food preservation. No more wasted produce, no more freezer-burned steaks, and no more throwing money away. Investing in the best vacuum sealer under 200 isn’t just about buying another gadget; it’s about adopting a smarter, more sustainable, and more delicious way of life.
Now go forth and seal! We’d love to hear about your vacuum sealing adventures and favorite things to preserve in the comments below.