So, you’ve just finished a marathon session of meal prepping, and your counter is lined with perfectly sealed bags of chicken, veggies, and fresh-caught fish. Your vacuum sealer has once again proven its worth. But what happens next? Do you just shove it back in the cabinet? Knowing How To Store Vacuum Sealer Safely is just as crucial as knowing how to use it. It’s the secret to keeping your machine in prime condition for years to come, ensuring every seal is as good as the first. Think of it less as a chore and more as an investment in your investment. Stick with me, and I’ll walk you through everything you need to know to protect your kitchen’s unsung hero.
Why Proper Storage Isn’t Just About Being Tidy
Let’s get one thing straight: properly storing your vacuum sealer is about more than just freeing up counter space. It’s about protecting the delicate and essential components that make the magic happen. When you neglect storage, you’re inviting trouble.
I’ve seen it countless times over the years. A client complains their sealer isn’t pulling a strong vacuum anymore, and nine times out of ten, the culprit is a warped or compressed gasket from improper storage. Your machine relies on a few key parts:
- The Gaskets: These soft foam or rubber strips create the airtight chamber necessary for a strong vacuum. If they get squashed or deformed, air leaks in, and your seal will be weak or nonexistent.
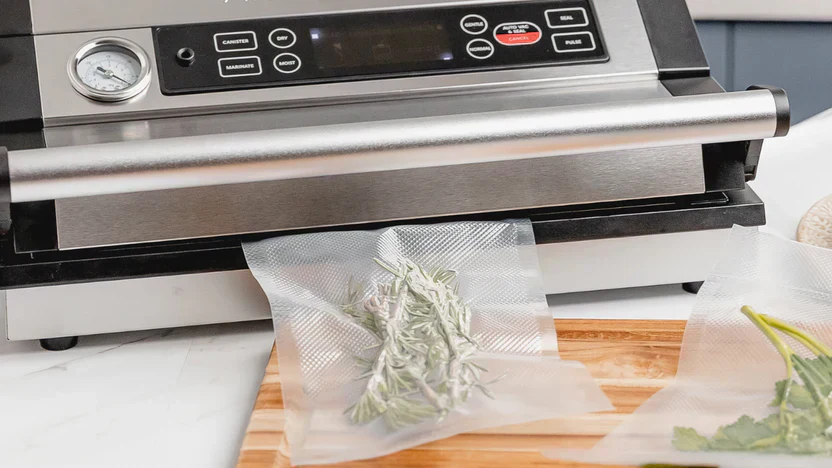
- The Sealing Bar: This is the heated strip that melts the plastic bag to create the final seal. It needs to stay clean and unobstructed to work effectively.
- The Vacuum Pump: This is the heart of the machine. Keeping it free from dust and moisture is paramount to its longevity.
Leaving your machine exposed to dust, cramming it into a tight space, or—and this is the big one—storing it with the lid latched shut is like asking for problems. It’s a slow but sure way to degrade its performance.
The Pre-Storage Ritual: A Step-by-Step Cleaning Guide
Before you even think about where to put your sealer, you need to make sure it’s clean. Storing a dirty machine is a recipe for bacteria growth and can attract pests. Plus, leftover food particles can harden and become much more difficult to remove later.
Here’s the simple, non-negotiable cleaning process I follow after every use:
- Unplug It! Safety first, always. Never clean an appliance while it’s connected to a power source.
- Wipe Down the Exterior: Use a damp, soft cloth to wipe away any fingerprints or food splatters from the outside of the unit. Avoid harsh chemicals or abrasive sponges that could scratch the surface.
3. Clean the Vacuum Channel and Drip Tray: This is where any excess liquid gets pulled during the sealing process. Most models have a removable drip tray. Take it out, wash it with warm, soapy water, and—this is critical—let it dry completely before putting it back. - Gently Clean the Gaskets: Use a damp cloth to gently wipe the upper and lower gaskets. Be careful not to use soap, as it can degrade the material over time. Just a simple wipe-down is enough to remove any residue.
- Inspect the Sealing Bar: Make sure there’s no melted plastic or food debris stuck to the heat strip. If there is, gently wipe it away with a soft, dry cloth after it has fully cooled down.
The Golden Rules: How to Store Vacuum Sealer Safely
Once your machine is sparkling clean and bone dry, you’re ready to store it. This is where most people make the biggest mistakes. Follow these golden rules, and your machine will thank you.
Rule 1: Never, Ever Latch the Lid Shut
If you take only one piece of advice from this article, let it be this. Storing your vacuum sealer with the lid clamped down is the number one cause of premature gasket failure. When you latch it, you’re constantly compressing those soft foam gaskets. Over time, they lose their shape and ability to spring back, a condition often called “gasket memory.”
“Think of your vacuum sealer gaskets like a brand-new memory foam pillow. If you leave a heavy book on it for a month, it’s going to leave a permanent dent. That’s exactly what happens to your gaskets when you store the sealer latched.” – Dr. Eleanor Vance, Food Preservation Specialist.
Instead, simply close the lid so it rests gently on the base. Some models even come with a storage clip or a setting that keeps the lid slightly ajar. If yours doesn’t, you can place a small piece of folded cardboard between the lid and the base to ensure there’s no pressure on the gaskets.
Rule 2: Mind the Power Cord
Don’t just wrap the power cord tightly around the unit. This can put stress on the connection points and cause the internal wires to fray over time, creating a serious safety hazard. Instead, loosely coil the cord and secure it with a twist tie or a Velcro strap. Many modern vacuum sealers have a built-in cord storage compartment on the underside—be sure to use it!
Rule 3: Choose the Right Spot
Where you store your sealer matters. You’re looking for a location that is:
- Cool and Dry: Heat and humidity are enemies of electronics. A pantry or a deep kitchen cabinet is ideal. Avoid storing it above your stove, near a dishwasher vent, or in a damp basement.
- Clean and Dust-Free: Dust can get into the motor and moving parts, affecting performance. Storing it in its original box or a dedicated dust cover can provide an extra layer of protection.
- Easily Accessible: Let’s be honest, if it’s a pain to get out, you’re less likely to use it. Find a spot that doesn’t require you to move three other appliances just to reach it.
Rule 4: Accommodate Your Sealer Type
How you store your machine can also depend on its design.
- External “Clamshell” Sealers: These are the most common type. The key here is the unlatched lid rule. Because they are often lightweight, you can store them on a sturdy shelf or in a cabinet. Some models are even designed to be stored vertically to save space, but always check your user manual first.
- Chamber Vacuum Sealers: These are heavier, bulkier units. They are almost always stored on a countertop or a sturdy utility cart. The same rules apply: keep the lid unlatched and the unit clean and dry. Due to their size, ensuring they have adequate ventilation around them is also important.
|
Our Picks for the Best Food Vacuum Cealer in 2026
As an Amazon Associate, we earn from qualifying purchases.
|
||
| Num | Product | Action |
|---|---|---|
| 1 | FoodSaver Vacuum Sealer Machine, Automatic Bag Detection, Sous Vide Friendly, with sealer bags, roll, handheld vacuum sealer, black |

|
| 2 | Chef Preserve Compact Vacuum Sealer for Food (Vacuum Sealer Machine + 30 Reusable Vacuum Bags) Powerful Handheld Vacuum Sealer Machine, Seal Meal Saver, Portable Food Sealer |
|
| 3 | Vakumar Liquid Vacuum Sealer Machine, 90Kpa Vacuum Sealer Machine Preservation Dry/Moist/Liquid Modes, LED Indicator Light, Handle Locked Design, Built-in Cutter and Bag Storage, Removable Drip Tray |
|
| 4 | NutriChef Automatic Vacuum Air Sealing System for Food Preservation with Starter Kit, Compact Design, Lab Tested, Dry & Moist Food Modes with Led Indicator Lights, Black |
|
| 5 | Nesco Deluxe Food VS-12 Vacuum Sealer, 130 Watts, Kit Bags & Viewing Lid, Compact, Silver |
|
| 6 | Vacuum Sealer Machine Powerful 90Kpa Precision 6-in-1 Compact Food Preservation System with Cutter, 2 Bag Rolls & 5 Pre-cut Bags, Widened 12mm Sealing Strip, Dry&Moist Modes (Silver) |
|
| 7 | FoodSaver Compact Vacuum Sealer Machine with Airtight Bags and Roll - Ideal for Sous Vide and Airtight Food Storage, White |
|
| 8 |
|
|
| 9 | SEATAO VH5188 Automatic Vacuum Sealer Machine, 90kPa Multifunction Commercial Vacuum Food Sealer For Food Preservation, Dry & Moist & Food & Extended Modes, LED lights, Double Seal |
|
| 10 | FoodSaver V4400 2-in-1 Vacuum Sealer Machine with Automatic Vacuum Sealer Bag Detection and Starter Kit |
|
Long-Term Storage vs. Everyday Keeping
Are you a daily user or someone who only breaks out the sealer for big jobs? Your storage strategy can vary slightly.
| Feature | Everyday Storage (Weekly Use) | Long-Term Storage (Monthly+ Use) |
|---|---|---|
| Cleaning | Wipe down after each use. | Perform a deep clean before storing. |
| Location | Easily accessible cabinet or pantry shelf. | In its original box, in a closet or dry storage area. |
| Lid Position | Always unlatched. | Critically unlatched, maybe with a spacer. |
| Cord Management | Loosely coiled or in the built-in storage. | Loosely coiled and secured with a tie. |
| Extra Step | None needed. | Consider placing it inside a plastic bag to prevent dust. |
If you’re pulling your sealer out of long-term storage, it’s always a good idea to give the gaskets a quick wipe with a damp cloth to remove any dust and “wake them up” before your first use. For more tips on getting the most out of your machine, check out our guide on troubleshooting common vacuum sealer problems.
Frequently Asked Questions (FAQ)
Here are some of the most common questions I get about vacuum sealer storage.
Q1: Can I store my vacuum sealer vertically on its side?
A: It depends entirely on the model. Some are specifically designed with a flat back or base for stable vertical storage to save cabinet space. However, if your model is rounded or unstable on its side, storing it vertically can risk it falling and breaking. Always consult your user manual for the manufacturer’s recommendation.
Q2: What’s the worst that can happen if I store it with the lid closed?
A: The worst-case scenario is that you’ll permanently compress the gaskets. This will prevent the machine from creating a proper vacuum, rendering it useless until you replace the gaskets. This is the most common and easily avoidable way people damage their sealers.
Q3: How often should I clean my vacuum sealer before storing it?
A: You should perform a basic wipe-down after every single use, especially if you’ve sealed moist foods. This prevents bacteria and mold. You don’t need to do a “deep clean” every time, but never store it with food residue or moisture inside the vacuum channel.
Q4: Is it safe to store the vacuum sealer in a garage or shed?
A: It’s generally not recommended. Garages and sheds often experience extreme temperature fluctuations and higher humidity levels than inside a house. This moisture can damage the electronic components and motor over time. A climate-controlled pantry or closet is a much safer bet.
Q5: How do I know if the gasket is damaged from improper storage?
A: The first sign is a weak vacuum. The machine might run, but it won’t pull all the air out of the bag. You can also visually inspect the gaskets. If they look flat, cracked, or have a noticeable indentation where they meet, they are likely damaged and need to be replaced.
Bringing It All Home
Your vacuum sealer is a powerful tool in the fight against food waste and a key player in a well-managed kitchen. Treating it with respect doesn’t end when the sealing is done. By taking a few extra minutes to clean it properly and store it correctly, you’re not just organizing your kitchen—you’re extending the life and performance of a valuable appliance.
Remember the key takeaways: always clean it, never latch it, and keep it in a cool, dry place. By making this a habit, you ensure that your sealer will be ready to perform flawlessly the next time you need it. Now that you know how to store your vacuum sealer safely, you’ve truly mastered the art of vacuum sealing from start to finish.