Ever opened your pantry to find that your brown sugar has turned into a solid rock, or your favorite coffee beans have lost their aromatic punch? It’s a common frustration. But what if you could lock in that just-bought freshness for months, or even years, using the simple glass jars you already own? Learning how to vacuum seal jars with an adapter is a game-changing skill for anyone serious about food storage, and it’s surprisingly easy to master. This isn’t just about saving leftovers; it’s about transforming your pantry into a fortress of freshness, protecting everything from dry goods to dehydrated snacks. In this guide, we’ll walk you through every step, turning you into a jar-sealing pro in no time.
Why Bother? The Magic Behind Sealing Jars
So, what’s the big deal? When you vacuum seal a jar, you’re not just putting a lid on it. You’re actively removing the number one enemy of fresh food: oxygen. Oxygen is what allows mold and bacteria to thrive, causes nuts and crackers to go stale, and makes coffee lose its flavor.
By using a vacuum sealer and a jar adapter, you suck almost all the air out of the jar before the lid creates an airtight seal. It’s like hitting the pause button on the aging process.
The key benefits are incredible:
- Massively Extended Shelf Life: We’re talking about keeping things like flour, rice, and pasta fresh for years instead of months.
- Preserves Flavor and Nutrients: Those expensive coffee beans, aromatic spices, and dehydrated fruits will taste just as good a year from now as they do today.
- Saves Money: Buy in bulk without fear of spoilage. You’ll drastically reduce food waste and save on your grocery bills.
- Ultimate Organization: A pantry filled with neatly organized, sealed glass jars is not only practical but also incredibly satisfying to look at.
“Glass jars are the gold standard for long-term dry goods storage. When you add a vacuum seal, you create a nearly perfect, oxygen-free environment. It’s the closest thing to a time capsule for your food that you can get in a home kitchen,” says Chef Isabella Rossi, a food preservation specialist.
What You’ll Need: Gearing Up for Success
Before you start, let’s get your tools in order. The great news is you don’t need a lot of fancy equipment.
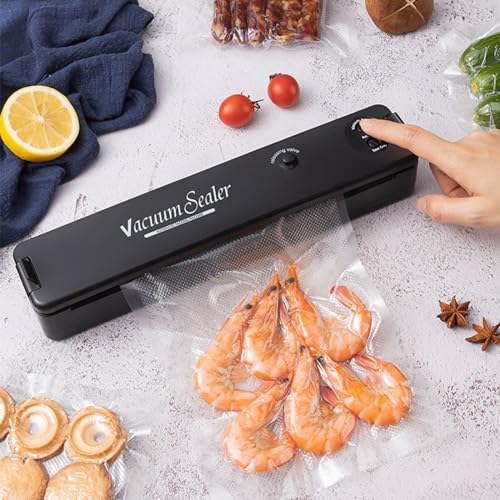
- A Countertop Vacuum Sealer: The most crucial piece of gear. Make sure yours has an accessory port. This is the little circular opening where you plug in the hose for attachments. Most models from brands like FoodSaver, Nesco, or Mueller have one.
- A Jar Sealer Adapter: This is the magic accessory. It usually comes in a set with two sizes: one for regular-mouth jars and one for wide-mouth jars. It also includes a hose to connect the adapter to your vacuum sealer.
- Mason-Type Jars: You must use jars designed for canning, like those from Ball, Kerr, or Bernardin. These jars are built to withstand pressure and have a special two-part lid system that is essential for a proper seal.
- Two-Piece Lids: This is critical. You need the flat metal lid with the rubbery compound on the underside and the separate metal screw band (or ring). You cannot use one-piece, lug-style lids from store-bought spaghetti sauce or pickles.
The Main Event: How to Vacuum Seal Jars with an Adapter (Step-by-Step)
Alright, let’s get down to business. Follow these simple steps, and you’ll be sealing like a pro.
- Prep Your Jars and Food:
Start with clean, completely dry jars. Any moisture can compromise the seal or lead to spoilage. This method is best for dry goods like beans, rice, flour, oats, pasta, dehydrated fruit, nuts, and coffee beans. - Fill ‘Er Up (But Not Too Much):
Fill the jar with your chosen food. Be sure to leave at least one inch of headspace at the top. This space is crucial for the lid to suck down and create a strong seal. Wipe the rim of the jar with a clean, dry cloth to remove any dust or food particles. A single grain of sugar on the rim can prevent a perfect seal. - Lid On, Ring Off:
Place the flat metal lid on top of the jar. Do not put the screw band (the ring) on. The adapter needs to sit directly on the glass around the lid to create a vacuum. - Connect the Adapter:
Place the jar sealer adapter over the top of the jar, making sure it’s centered over the lid. Plug one end of the accessory hose into the port on top of the adapter and the other end into the accessory port on your vacuum sealer. - Start the Sealer:
Turn on your vacuum sealer and press the “Canister” or “Accessory” button. The machine will whir to life and begin pulling the air out of the jar. You might need to press down gently on the adapter for the first few seconds to help it create an initial seal. - The ‘Pop’ of Success:
You’ll know the process is complete when the vacuum sealer motor stops automatically. Now, carefully remove the hose from the adapter first, then lift the adapter off the jar. You should hear a satisfying hiss as a tiny bit of air equalizes in the adapter, but the jar will remain sealed. - Check Your Seal and Finish Up:
Press down on the center of the lid. If it is firm and doesn’t flex or pop up and down, congratulations—you have a perfect seal! Now, you can screw on the metal band. Don’t overtighten it; just secure it finger-tight. The band is there to protect the lid and keep it from being knocked loose during storage, not to hold the seal. Label your jar with the contents and the date, and you’re done!
|
Our Picks for the Best Food Vacuum Cealer in 2026
As an Amazon Associate, we earn from qualifying purchases.
|
||
| Num | Product | Action |
|---|---|---|
| 1 | Vakumar Liquid Vacuum Sealer Machine, 90Kpa Vacuum Sealer Machine Preservation Dry/Moist/Liquid Modes, LED Indicator Light, Handle Locked Design, Built-in Cutter and Bag Storage, Removable Drip Tray |

|
| 2 | Nesco Deluxe Food VS-12 Vacuum Sealer, 130 Watts, Kit Bags & Viewing Lid, Compact, Silver |
|
| 3 | SEATAO VH5188 Automatic Vacuum Sealer Machine, 90kPa Multifunction Commercial Vacuum Food Sealer For Food Preservation, Dry & Moist & Food & Extended Modes, LED lights, Double Seal |
|
| 4 | FoodSaver V4400 2-in-1 Vacuum Sealer Machine with Automatic Vacuum Sealer Bag Detection and Starter Kit |
|
| 5 | Vacuum Sealer Machine Powerful 90Kpa Precision 6-in-1 Compact Food Preservation System with Cutter, 2 Bag Rolls & 5 Pre-cut Bags, Widened 12mm Sealing Strip, Dry&Moist Modes (Silver) |
|
| 6 | NutriChef Automatic Vacuum Air Sealing System for Food Preservation with Starter Kit, Compact Design, Lab Tested, Dry & Moist Food Modes with Led Indicator Lights, Black |
|
| 7 |
|
|
| 8 | FoodSaver Compact Vacuum Sealer Machine with Airtight Bags and Roll - Ideal for Sous Vide and Airtight Food Storage, White |
|
| 9 | FoodSaver Vacuum Sealer Machine, Automatic Bag Detection, Sous Vide Friendly, with sealer bags, roll, handheld vacuum sealer, black |
|
| 10 | Chef Preserve Compact Vacuum Sealer for Food (Vacuum Sealer Machine + 30 Reusable Vacuum Bags) Powerful Handheld Vacuum Sealer Machine, Seal Meal Saver, Portable Food Sealer |
|
Pro Tips from the Food Vacuum Sealer Kitchen
After sealing hundreds of jars, I’ve picked up a few tricks that make the process foolproof.
- For Powdery Items: When sealing fine powders like flour or confectioners’ sugar, place a coffee filter or a small piece of paper towel on top of the contents before putting on the lid. This prevents the fine powder from being sucked up into the adapter and vacuum sealer, which could damage your machine over time.
- Use Oxygen Absorbers: For ultra-long-term storage (we’re talking 10+ years), toss a small oxygen absorber packet into the jar before sealing. The vacuum sealer removes about 95% of the air; the oxygen absorber will take care of the rest, creating a truly oxygen-free environment.
- “Condition” Your Lids: Some users find that gently warming the flat lids in hot (not boiling) water for a minute helps soften the sealing compound and achieve a more reliable seal, just like in traditional canning. Make sure to dry them completely before use.
- Troubleshooting a Failed Seal: If your lid doesn’t seal, don’t panic. The most common culprits are a dirty jar rim, a nick or chip in the glass, or a defective lid. Simply wipe the rim again, try a new lid, and repeat the process.
What to Seal and What to Skip: The Dos and Don’ts
While this method is fantastic, it’s not for everything. Knowing what works and what doesn’t is key to safe and effective food storage.
Foods That Are PERFECT for Jar Sealing:
- Dry Grains and Legumes: Rice, wheat berries, quinoa, dried beans, lentils.
- Baking Supplies: All-purpose flour, sugar, salt, cocoa powder, cornmeal.
- Nuts and Seeds: Almonds, walnuts, sunflower seeds, flax seeds.
- Dehydrated Foods: Dried fruits, vegetable chips, homemade jerky, herbs.
- Snacks: Crackers, pretzels, popcorn kernels.
- Coffee and Tea: Whole bean or ground coffee, loose-leaf tea.
Foods to AVOID Sealing This Way:
- Fresh, Moist Foods: This method does not replace canning for preserving fresh vegetables, meats, or sauces. Vacuum sealing these items without proper canning can create a dangerous, oxygen-free environment where botulism can grow.
- Very Soft, Fresh Cheeses: These contain too much moisture.
- Fresh Mushrooms, Garlic, and Onions: These can emit gases and harbor anaerobic bacteria, which thrive without oxygen.
- Liquids: Never try to vacuum seal pure liquids like soup or broth in a jar. They will be sucked directly into your machine, causing a huge mess and likely destroying it. If you want to seal liquids, freeze them solid in the jar first.
Frequently Asked Questions (FAQ)
Q1: Can I reuse the Mason jar lids for vacuum sealing?
A1: Yes, you can! Unlike with heat canning, the sealing compound on the lid is not compromised during vacuum sealing. As long as the lid is not dented or bent, you can use it multiple times for dry storage. Just wash it and ensure it’s completely dry before reusing.
Q2: How do I know if my jar is still sealed?
A2: The best way to check is the “press test.” The center of the lid should be concave (curved inward) and should not move or make a popping sound when you press on it. If it does, the seal has been broken, and you should use the contents soon or reseal the jar.
Q3: My adapter won’t seal to the jar. What’s wrong?
A3: First, make sure you are using the correct size adapter (regular or wide-mouth) for your jar. Second, check that the rubber gasket inside the adapter is clean and seated properly. Finally, ensure the jar rim is perfectly clean and free of any nicks or chips.
Q4: How long will vacuum-sealed food last in jars?
A4: For dry goods, vacuum sealing can increase the shelf life by 3 to 5 times or more. While flour might normally last 6-8 months, it can easily last 2-4 years when vacuum sealed. Dehydrated goods can last for decades under ideal conditions.
Q5: Do I need a specific brand of vacuum sealer for this to work?
A5: Not at all. As long as your vacuum sealer has an accessory port for an external hose, it should be compatible with a standard jar sealer adapter set. These adapters are generally designed to be universal.
Your Pantry, Perfected
You are now equipped with the knowledge to revolutionize your food storage. This simple process of learning how to vacuum seal jars with an adapter opens up a world of possibilities, from preserving your garden’s dehydrated bounty to making the most of bulk-bin bargains. It’s an empowering skill that reduces waste, saves money, and ensures you always have fresh, high-quality ingredients on hand. So go ahead, dust off those jars, fire up your sealer, and take control of your pantry.