Ever opened your pantry to find a bag of brown sugar that’s turned into a solid brick? Or discovered your favorite coffee beans have lost their amazing aroma? We’ve all been there. It’s a constant battle to keep dry goods fresh, organized, and safe from pests. But what if I told you there’s a simple, incredibly effective solution sitting right on your countertop? Learning How To Vacuum Seal Mason Jars is a game-changer for pantry organization and food preservation. It transforms your humble glass jars into a fortress of freshness, extending the life of everything from grains and nuts to dried herbs and spices. Forget flimsy bags and messy containers; this technique is your ticket to a smarter, more efficient kitchen.
Why Should You Vacuum Seal Mason Jars Anyway?
Before we dive into the “how,” let’s talk about the “why.” You might be thinking, “Isn’t the lid on a mason jar good enough?” For short-term storage, maybe. But for long-term freshness, removing the air makes a world of difference.
Vacuum sealing works by removing the oxygen from the container. Oxygen, while essential for us, is the primary enemy of stored food. It causes oxidation, which leads to stale flavors, nutrient loss, and spoilage. By sucking out the air, you press the pause button on this process.
Here are the key benefits you’ll unlock:
- Dramatically Extended Shelf Life: Dry goods like flour, rice, pasta, and beans can last for years instead of months. Coffee beans and nuts retain their flavor and freshness significantly longer, preventing them from going stale or rancid.
- Ultimate Protection: An airtight seal keeps out moisture, which can cause clumping and mold. It’s also an impenetrable barrier against pantry pests like weevils and moths.
- Superior Organization: Clear glass jars allow you to see exactly what you have at a glance. It creates a clean, uniform look in your pantry that’s far more satisfying than a jumble of half-opened bags.
- Cost Savings: Buying in bulk is almost always cheaper. Now you can confidently stock up on your favorite items without worrying about them spoiling before you can use them.
- Preserving Dehydrated Foods: If you’re into dehydrating fruits, veggies, or herbs from your garden, vacuum sealing in jars is the absolute best way to preserve their color, flavor, and texture.
“Vacuum sealing isn’t just about preservation; it’s about respecting your ingredients. By removing oxygen, you’re essentially freezing a food’s flavor and nutritional profile in time, without the freezer.” – Dr. Eleanor Vance, Food Preservation Specialist.
What Gear Do You Need to Get Started?
Getting set up is surprisingly simple. You don’t need a massive, industrial machine. In fact, many standard countertop vacuum sealers are perfectly equipped for the job.
Here’s your essential checklist:
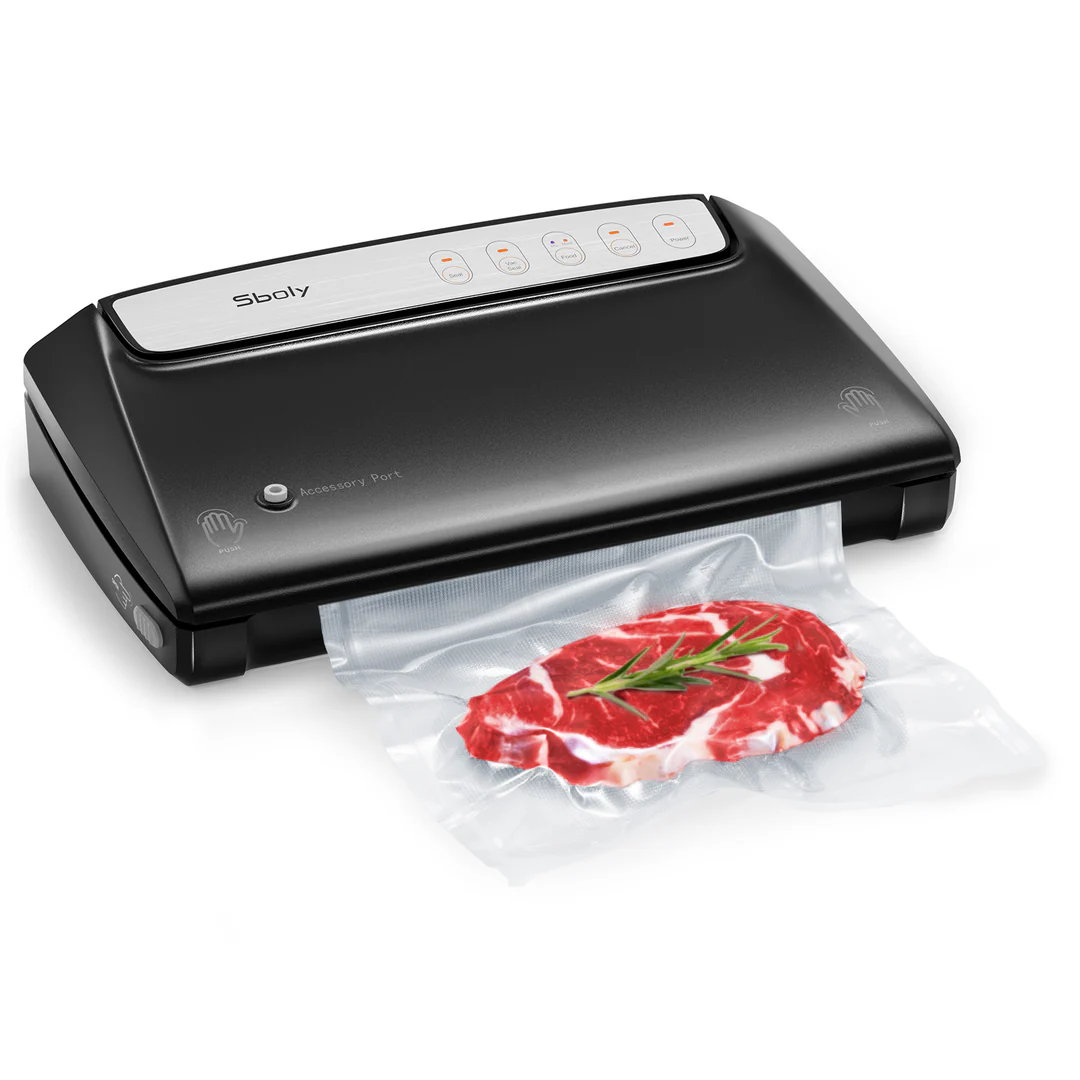
- A Vacuum Sealer with an Accessory Port: This is the most crucial part. You need a machine that has a small, circular port to plug an external hose into. Most popular models from brands like FoodSaver, Nesco, and Vesta Precision have this feature. If you’re in the market for one, check out our guide on [choosing the best vacuum sealer for your needs].
- A Mason Jar Sealer Attachment: This is the special tool that makes the magic happen. It consists of two main parts: a wide-mouth jar sealer and a regular-mouth jar sealer. It’s a plastic bell-shaped device that fits over the top of the jar lid. You’ll also need the accessory hose that connects this attachment to your vacuum sealer.
- Mason Jars and Two-Piece Lids: You’ll need standard canning jars (like Ball or Kerr brands) with a flat lid and a screw-on ring. It’s critical that the flat lids are new or in perfect condition, as a bent or damaged lid will not create a proper seal.
How to Vacuum Seal Mason Jars: A Step-by-Step Guide
Alright, let’s get down to business. Once you have your gear, the process is incredibly straightforward. I remember the first time I sealed a jar of my favorite expensive coffee beans; hearing that satisfying “pop” when I opened it weeks later was a revelation.
Follow these simple steps, and you’ll be a pro in no time.
- Prepare Your Jars: Make sure your mason jars are completely clean and, most importantly, bone dry. Any moisture left inside can compromise the food, especially with dry goods.
- Fill ‘Er Up: Fill the jar with your desired food, like rice, beans, oats, or dehydrated fruit. Be sure to leave about one inch of headspace at the top. This space is essential for the vacuum process to work correctly.
- Wipe the Rim: This step is non-negotiable! Use a clean, dry cloth to wipe the rim of the jar. Any food particles, dust, or oils left on the rim can prevent the lid from forming a perfect, airtight seal.
- Place the Lid: Place a flat lid on top of the jar. Do not put the screw-on ring on yet! The ring is not needed for the sealing process and will actually prevent it from working.
- Position the Jar Sealer Attachment: Place the appropriate jar sealer attachment (wide-mouth or regular) firmly over the top of the jar, ensuring it covers the entire lid.
- Connect the Hose: Plug one end of the accessory hose into the port on your vacuum sealer and the other end into the port on top of the jar sealer attachment.
- Start the Sealer: Turn on your vacuum sealer and press the “Accessory” or “Canister” button. The machine will whir to life, sucking all the air out of the jar. You’ll see the lid concave slightly as the vacuum is created. The machine will automatically shut off once the process is complete.
- Remove and Check the Seal: Carefully remove the hose and then the jar sealer attachment. To check the seal, lift the jar by holding only the edges of the lid. If the seal is strong, the lid will hold the full weight of the jar. You shouldn’t be able to pull the lid off with your fingers.
- Add the Ring (Optional but Recommended): Gently screw on the metal ring. Don’t overtighten it—just secure it “finger-tight.” The ring doesn’t maintain the seal (the vacuum does that), but it protects the lid from being accidentally knocked or pried open during storage.
- Label and Store: Always label your jars with the contents and the date you sealed them. Store them in a cool, dark place like a pantry or cupboard.
And that’s it! You’ve successfully learned how to vacuum seal mason jars.
|
Our Picks for the Best Food Vacuum Cealer in 2026
As an Amazon Associate, we earn from qualifying purchases.
|
||
| Num | Product | Action |
|---|---|---|
| 1 | Vakumar Liquid Vacuum Sealer Machine, 90Kpa Vacuum Sealer Machine Preservation Dry/Moist/Liquid Modes, LED Indicator Light, Handle Locked Design, Built-in Cutter and Bag Storage, Removable Drip Tray |

|
| 2 | FoodSaver Compact Vacuum Sealer Machine with Airtight Bags and Roll - Ideal for Sous Vide and Airtight Food Storage, White |
|
| 3 |
|
|
| 4 | FoodSaver V4400 2-in-1 Vacuum Sealer Machine with Automatic Vacuum Sealer Bag Detection and Starter Kit |
|
| 5 | Vacuum Sealer Machine Powerful 90Kpa Precision 6-in-1 Compact Food Preservation System with Cutter, 2 Bag Rolls & 5 Pre-cut Bags, Widened 12mm Sealing Strip, Dry&Moist Modes (Silver) |
|
| 6 | Nesco Deluxe Food VS-12 Vacuum Sealer, 130 Watts, Kit Bags & Viewing Lid, Compact, Silver |
|
| 7 | NutriChef Automatic Vacuum Air Sealing System for Food Preservation with Starter Kit, Compact Design, Lab Tested, Dry & Moist Food Modes with Led Indicator Lights, Black |
|
| 8 | Chef Preserve Compact Vacuum Sealer for Food (Vacuum Sealer Machine + 30 Reusable Vacuum Bags) Powerful Handheld Vacuum Sealer Machine, Seal Meal Saver, Portable Food Sealer |
|
| 9 | FoodSaver Vacuum Sealer Machine, Automatic Bag Detection, Sous Vide Friendly, with sealer bags, roll, handheld vacuum sealer, black |
|
| 10 | SEATAO VH5188 Automatic Vacuum Sealer Machine, 90kPa Multifunction Commercial Vacuum Food Sealer For Food Preservation, Dry & Moist & Food & Extended Modes, LED lights, Double Seal |
|
Pro Tips for Perfect Jar Sealing Every Time
Once you’ve mastered the basics, a few extra tricks can take your food preservation game to the next level.
- Don’t Overfill: That one inch of headspace is your best friend. Overfilling is the number one cause of a failed seal.
- Powdery Problems: For very fine powders like flour or cocoa powder, place a coffee filter or a small piece of paper towel on top of the contents before placing the lid. This prevents the fine powder from being sucked up into the machine and interfering with the seal.
- Add an Oxygen Absorber: For super long-term storage (we’re talking 5+ years for things like beans and rice), toss in a small oxygen absorber packet before sealing. This will absorb the tiny bit of residual oxygen left in the jar, offering maximum protection.
- What if a Seal Fails? Don’t panic! It happens. The most common culprits are a dirty rim, a damaged lid, or not enough headspace. Simply clean the rim, grab a new lid, and try the process again.
- Re-sealing Jars: The beauty of this system is its reusability. When you open a jar, you’ll hear a “whoosh” as the air rushes in. You can then take what you need and simply reseal the jar with the same lid (as long as it wasn’t damaged by the opener) to keep the remaining contents fresh.
What Foods Should You Vacuum Seal in Jars? (And What to Avoid)
This method is fantastic for a wide range of dry and dehydrated foods. However, it’s not a one-size-fits-all solution.
Perfect Candidates for Jar Sealing:
- Grains and Legumes: White rice, beans, lentils, quinoa, and rolled oats.
- Baking Supplies: All-purpose flour, whole wheat flour, cornmeal, and seeds.
- Nuts and Seeds: Raw almonds, walnuts, pecans, and sunflower seeds (short-term to prevent rancidity).
- Coffee and Tea: Whole bean coffee and loose-leaf tea. Sealing preserves their volatile aromatic compounds.
- Dehydrated Foods: Dried fruits, vegetable chips, jerky, and garden herbs.
- Snacks: Crackers, pretzels, and popcorn kernels stay perfectly crisp.
Foods to Avoid or Use Caution With:
- Powdered Sugar & Brown Sugar: Vacuum sealing can turn these into dense, hard blocks due to the lack of air. It’s better to store them in airtight containers with a terracotta brown sugar saver.
- Fresh Fruits and Vegetables: Don’t vacuum seal fresh, soft produce in jars. This method is not a substitute for proper canning (which involves heat processing to kill bacteria).
- Liquids: While you can technically vacuum seal some liquids, it’s very tricky and often requires a [chamber vacuum sealer]. Trying this with a standard sealer can suck liquid into the machine and destroy it.
- Oily Foods: Items with high-fat content, like roasted nuts, can go rancid even without oxygen. Vacuum sealing helps, but it won’t make them last forever. Store in a cool, dark place and use within a few months.
Frequently Asked Questions
Is vacuum sealing in mason jars the same as canning?
Absolutely not. This is a critical distinction. Canning uses heat to sterilize the food and the jar, killing off microorganisms like botulism spores, which makes food shelf-stable. Vacuum sealing only removes air to preserve freshness and is only suitable for dry, low-moisture goods. Never use this method for wet or low-acid foods that require proper pressure canning.
How long will my food last after vacuum sealing?
It depends on the food, but you can expect a shelf life that is 3 to 5 times longer than normal. For dry goods like white rice and beans stored in ideal conditions, this could mean many years. For things like nuts or whole wheat flour, it extends freshness from a few months to over a year.
Can I reuse the mason jar lids for vacuum sealing?
Yes, you often can! As long as the lid is not bent, dented, or scratched, and the rubber sealing compound is intact, it can typically be reused multiple times for vacuum sealing dry goods. You’ll know it’s time for a new one when it fails to hold a seal.
Do I need to keep the metal ring on after sealing?
It’s highly recommended. While the vacuum holds the lid on, the screw-on ring protects the seal from being accidentally broken if the jar is bumped or something brushes against the lid in the pantry.
Can I use my handheld vacuum sealer for jars?
Yes, some handheld models are designed to work with jar sealer attachments. Check your device’s manual. They can be a great, compact option if you primarily plan on sealing jars rather than bags.
Your Pantry’s New Best Friend
Learning how to vacuum seal mason jars is more than just a storage hack; it’s a fundamental shift in how you manage your kitchen. It’s an investment that pays you back in fresher food, less waste, and a beautifully organized pantry. You’ll save money by buying in bulk, enjoy better-tasting ingredients, and have the peace of mind that comes with a well-stocked, well-protected larder. So go ahead, dust off those mason jars, fire up your vacuum sealer, and discover the simple joy of a perfectly preserved pantry.