Ever opened your freezer to find a beautiful cut of steak, only to see it covered in those dreaded icy crystals? That, my friends, is freezer burn, the culinary villain that turns prime beef into a dry, tasteless puck. Or how about buying fresh berries on sale, only to have them turn to mush in a few days? We’ve all been there. It feels like throwing money straight into the compost bin. That’s why I’m here to talk about a kitchen gadget that I believe is a total game-changer. This is my in-depth Automatic Vacuum Sealer Review, and we’re going to dive deep into how this device can revolutionize your kitchen, save you money, and make your food taste better for longer.
For years, I relied on plastic wrap and zip-top bags, thinking I was doing enough. But the truth is, the real enemy of food freshness is air—specifically, oxygen. It causes oxidation, which leads to spoilage, nutrient loss, and off-flavors. An automatic vacuum sealer tackles this problem head-on, and the results are honestly pretty incredible. Stick with me, and I’ll show you exactly how.
What is an Automatic Vacuum Sealer and How Does It Work?
So, what’s the magic behind these machines? It’s actually quite simple. An automatic vacuum sealer removes the air from a specially designed bag or container and then uses heat to create an airtight seal. By eliminating most of the oxygen, you dramatically slow down the process of spoilage.
Think of it like this: leaving food out in the open is like leaving a bicycle in the rain to rust. Storing it in a regular bag is like putting it under a leaky tarp. Vacuum sealing? That’s like putting that bike in a climate-controlled, rust-proof garage. The protection is on a whole different level.
The key benefits are immediate and impactful:
- Extended Freshness: Food can last up to 5 times longer than with traditional storage methods. Your cheese won’t mold as fast, and your coffee beans will retain their aroma for weeks.
- No More Freezer Burn: By removing the air, you prevent the formation of ice crystals that destroy the texture and flavor of frozen foods.
- Save Money: You can buy food in bulk when it’s on sale, portion it out, and seal it for later. This drastically reduces food waste, which is a huge win for your wallet.
- Marinating in Minutes: The vacuum pressure opens up the pores of meat and fish, allowing marinades to penetrate deeply in as little as 20 minutes instead of hours.
- Perfect for Sous Vide: If you’re into sous vide cooking, a vacuum sealer is non-negotiable. It ensures a perfect, water-tight seal for even cooking.
What Are the Common Types of Food Vacuum Sealers?
Not all vacuum sealers are created equal. They generally fall into two main categories, and understanding the difference is key to finding the right fit for your kitchen.
External or Edge Sealers
This is the most common type you’ll find for home use. You place the open end of the bag into a channel on the machine’s “edge.” The machine then sucks the air out of the bag and seals it. They are compact, affordable, and perfect for the average household. They work best with dry goods and solid foods. While you can seal moist items, it requires a bit more care to prevent liquid from being sucked into the machine’s motor.
Chamber Vacuum Sealers
These are the heavy-duty powerhouses of the vacuum sealing world. You place the entire bag inside a chamber. The machine then removes the air from the entire chamber, which equalizes the pressure inside and outside the bag. This clever process allows you to seal liquids like soups, stews, and sauces without making a mess. They are larger, more expensive, and typically found in commercial kitchens or in the homes of serious food enthusiasts.
A Word from an Expert: “For 95% of home cooks, a quality external sealer is more than enough,” says Chef Julian Carter, a food preservation specialist. “They are incredibly versatile. The trick is learning the techniques for handling moist foods, which unlocks their full potential.”
How to Use an Automatic Vacuum Sealer: A Step-by-Step Guide
Using one of these machines might seem intimidating, but I promise it’s easier than making toast. Here’s the basic rundown:
- Prepare Your Food: Make sure your food is clean and dry. For moist items like raw meat, pat it dry with a paper towel. For liquids or very soft foods, it’s a great idea to pre-freeze them for an hour or two until they are solid.
- Fill the Bag: Use a bag designed for vacuum sealing. Don’t overfill it! Leave at least 3-4 inches (about 8-10 cm) of empty space at the top. This gives the machine enough room to get a good grip and create a strong seal.
- Position the Bag: Open the lid of your sealer and carefully place the open end of the bag into the vacuum channel or drip tray. Make sure the bag is flat and smooth, with no wrinkles in the area that will be sealed.
- Lock and Seal: Close the lid and lock it in place (most models have side latches that click). Press the “Vacuum & Seal” button. The machine will whir to life, suck out all the air, and the sealing light will indicate when the heat strip is creating the seal.
- Release and Inspect: Once the process is finished, the machine will usually shut off automatically. Unlock the lid, remove your perfectly sealed bag, and admire your handiwork! Check the seal to ensure it’s clear and complete.
Tips and Tricks for the Best Sealing Results
After using these machines for years, I’ve picked up a few tricks that make a world of difference.
- Double Seal: For long-term freezer storage or for sealing liquids, run a second seal just above the first one. It’s a little extra insurance against any potential leaks.
- The Paper Towel Trick: When sealing particularly juicy items like burgers or fish, fold a small paper towel and place it inside the bag between the food and where the seal will be. It will catch any excess moisture before it reaches the machine.
- Blanch Your Veggies: For vegetables like broccoli, cauliflower, and beans, it’s best to blanch them quickly before sealing. This stops the enzyme action that can lead to off-flavors and poor texture, even in the freezer.
- Label Everything: You might think you’ll remember what’s in that bag and when you sealed it, but trust me, you won’t. Use a permanent marker to write the contents and the date directly on the bag.
|
Our Picks for the Best Food Vacuum Cealer in 2026
As an Amazon Associate, we earn from qualifying purchases.
|
||
| Num | Product | Action |
|---|---|---|
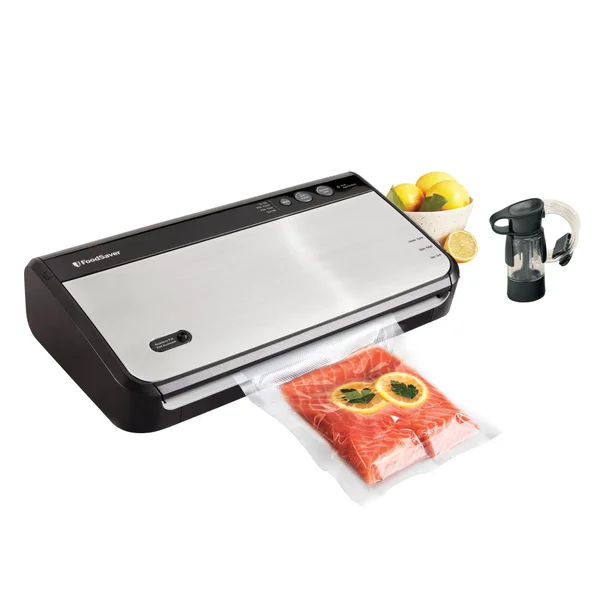
| 1 | FoodSaver V4400 2-in-1 Vacuum Sealer Machine with Automatic Vacuum Sealer Bag Detection and Starter Kit |

|
| 2 | Chef Preserve Compact Vacuum Sealer for Food (Vacuum Sealer Machine + 30 Reusable Vacuum Bags) Powerful Handheld Vacuum Sealer Machine, Seal Meal Saver, Portable Food Sealer |
|
| 3 | FoodSaver Compact Vacuum Sealer Machine with Airtight Bags and Roll - Ideal for Sous Vide and Airtight Food Storage, White |
|
| 4 | SEATAO VH5188 Automatic Vacuum Sealer Machine, 90kPa Multifunction Commercial Vacuum Food Sealer For Food Preservation, Dry & Moist & Food & Extended Modes, LED lights, Double Seal |
|
| 5 | NutriChef Automatic Vacuum Air Sealing System for Food Preservation with Starter Kit, Compact Design, Lab Tested, Dry & Moist Food Modes with Led Indicator Lights, Black |
|
| 6 | Nesco Deluxe Food VS-12 Vacuum Sealer, 130 Watts, Kit Bags & Viewing Lid, Compact, Silver |
|
| 7 | FoodSaver Vacuum Sealer Machine, Automatic Bag Detection, Sous Vide Friendly, with sealer bags, roll, handheld vacuum sealer, black |
|
| 8 | Vakumar Liquid Vacuum Sealer Machine, 90Kpa Vacuum Sealer Machine Preservation Dry/Moist/Liquid Modes, LED Indicator Light, Handle Locked Design, Built-in Cutter and Bag Storage, Removable Drip Tray |
|
| 9 |
|
|
| 10 | Vacuum Sealer Machine Powerful 90Kpa Precision 6-in-1 Compact Food Preservation System with Cutter, 2 Bag Rolls & 5 Pre-cut Bags, Widened 12mm Sealing Strip, Dry&Moist Modes (Silver) |
|
Foods You Should and Shouldn’t Vacuum Seal
While a vacuum sealer is incredibly versatile, it’s not a magic wand for every single item in your fridge. Knowing what works and what doesn’t is crucial.
Great Foods for Vacuum Sealing
- Meats and Poultry: Beef, chicken, pork, and fish hold up beautifully.
- Hard Cheeses: Prevents mold and keeps them from drying out.
- Dry Goods: Coffee beans, nuts, flour, sugar, and pasta are protected from pests and moisture.
- Fresh Vegetables: Carrots, peppers, green beans (after blanching).
- Prepared Meals: Seal individual portions of chili, lasagna, or casseroles for easy weeknight dinners.
Foods to Avoid or Use Caution With
- Soft Cheeses: Cheeses like Brie and ricotta don’t do well under vacuum pressure.
- Cruciferous Vegetables (Raw): Broccoli, cabbage, and Brussels sprouts emit gases as they ripen. Sealing them raw can cause the bag to inflate and the veggies to spoil. Always blanch or cook them first.
- Garlic and Onions (Raw): These can pose a risk of botulism when stored in an oxygen-free environment at room temperature. It’s much safer to seal them cooked or frozen.
- Mushrooms: Raw mushrooms can ripen and decay more quickly when sealed. It’s better to cook them first.
How Do I Choose the Right Machine? An Automatic Vacuum Sealer Review Guide
With so many models on the market, choosing one can feel overwhelming. Here’s what to look for based on our comprehensive automatic vacuum sealer review process:
- Suction Power: A strong motor will create a tighter vacuum and a more reliable seal. This is especially important for preserving food for the long term.
- Sealing Bar Width: A wider sealing bar provides a more secure seal. Look for models that offer an extra-wide seal or a double-seal option.
- Key Features:
- Moist/Dry Settings: This function adjusts the sealing time to handle different types of food, preventing liquids from interfering with the seal.
- Pulse Mode: Gives you manual control over the vacuum process, which is perfect for delicate items like bread or chips that you don’t want to crush.
- Accessory Port: Allows you to use attachments to seal canisters and jars, which is great for marinating or storing liquids.
- Size and Storage: Consider how much counter space you have. Some models are sleek and compact, while others are bulkier but more powerful.
- Budget: You can find decent models for under $100, while high-end machines can cost several hundred. Generally, investing a bit more gets you a stronger motor and more durable construction. Check out our list of the best vacuum sealers for every budget.
Frequently Asked Questions
Can you reuse vacuum sealer bags?
Yes, you can, but with some caveats. If the bag previously held raw meat, poultry, or fish, you should not reuse it due to the risk of bacterial contamination. For other foods, you can wash the bags thoroughly in warm, soapy water and let them dry completely. You’ll need to cut off the old seal, so the bag will get shorter with each use.
Do I have to use special bags for my vacuum sealer?
Yes, you need to use bags specifically designed for vacuum sealing. These bags have special channels or textures on one side that allow the air to be fully removed. Regular plastic bags are smooth and will trap air, preventing a proper vacuum from forming.
How long does vacuum-sealed food last in the freezer?
Properly vacuum-sealed food can last in the freezer for 2-3 years without any loss of quality, compared to just 6-12 months for conventionally stored foods. This is a massive difference and where the real savings come in.
Can an automatic vacuum sealer reseal chip bags?
Many models can! Look for a “Seal Only” function. This allows you to create a new heat seal on a chip or snack bag without activating the vacuum. It keeps your snacks much fresher than a simple bag clip.
Is an automatic vacuum sealer worth the investment?
Absolutely. When you consider the money saved from buying in bulk, extending the life of your fresh groceries, and eliminating food waste from spoilage and freezer burn, the machine often pays for itself within a year.
The Final Verdict
So, after this deep dive and automatic vacuum sealer review, is this gadget a must-have? In my book, it’s a resounding yes. It’s more than just a fancy appliance; it’s a tool that empowers you to be smarter with your food and your money. It bridges the gap between your grocery haul and your dinner table, ensuring that the food you buy stays as fresh and delicious as the day you bought it. If you’re tired of wasting food and want to elevate your food storage game, an automatic vacuum sealer is one of the best investments you can make for your kitchen.