Let’s be real for a moment: how much food do you think you throw away each month? That half-eaten block of cheese that went fuzzy, the steak that got freezer burn, or the fresh berries that turned to mush in three days. It all adds up, and it feels like you’re literally throwing money in the trash. That’s where a good vacuum sealer comes in, but the big question is, do you need to shell out big bucks for one? This comprehensive Budget Vacuum Sealer Review is here to tell you that, no, you absolutely don’t. We’re going to break down everything you need to know to find an affordable machine that will revolutionize your kitchen, save you money, and keep your food fresher for up to five times longer.
What Exactly Does a Vacuum Sealer Do, Anyway?
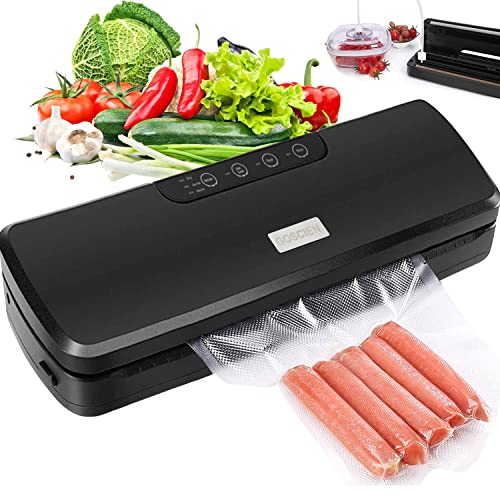
A vacuum sealer is a kitchen appliance that removes air from a specially designed bag or container and then creates an airtight seal. This simple process is incredibly effective because it targets the main culprits of food spoilage: oxygen and moisture. By removing the air, you dramatically slow down the growth of bacteria, mold, and yeast, and you completely prevent freezer burn, which is what happens when air comes into contact with the surface of frozen food.
Think of it like hitting the pause button on the aging process of your food. The key benefits are impossible to ignore:
- Massive Money Savings: Buy in bulk when items are on sale, seal them in meal-sized portions, and enjoy the savings for weeks or even months. No more food waste.
- Extended Freshness: Keep produce, meats, and cheeses fresh in the fridge and freezer for significantly longer.
- Superior Flavor and Texture: Say goodbye to icy, tasteless frozen foods. Vacuum sealing locks in moisture and flavor, so your food tastes just as good as the day you bought it.
- Efficient Meal Prepping: Prepare your meals for the week, seal them, and they’re ready to go. It’s a game-changer for busy lifestyles.
- Perfect for Sous Vide: If you’re into sous vide cooking, a vacuum sealer is an essential tool for achieving perfect, evenly cooked results.
Decoding the Lingo: Types of Budget Vacuum Sealers
When you start your search, you’ll mainly encounter two types of vacuum sealers. For anyone looking for a budget-friendly option, the choice is pretty clear.
External (or Edge) Vacuum Sealers
This is the most common and affordable type you’ll find. You place the open end of the bag into the machine’s sealing channel, close the lid, and the machine sucks the air out from the opening before heat-sealing it shut. They are compact, easy to use, and perfect for most home kitchens.
Chamber Vacuum Sealers
These are the heavy-duty, commercial-grade machines. You place the entire bag inside a chamber, and the machine removes air from the whole chamber before sealing the bag. They are fantastic for sealing liquids and are faster for sealing multiple items, but they are also much larger, heavier, and significantly more expensive.
As food preservation expert Chef Isabella Rossi notes, “For 99% of home cooks, an external sealer is the perfect tool. The technology has become so good that a quality budget model can deliver a seal that’s just as reliable as a commercial machine for everyday tasks like preserving meats, cheeses, and dry goods.”
For the purpose of this budget vacuum sealer review, we’ll be focusing entirely on the external models that deliver the best bang for your buck. Understanding the landscape of affordable options is key. To explore this further, learning about the best vacuum sealer under 50 provides a great foundation for making an informed choice without overspending.
| Feature | External (Edge) Sealer | Chamber Sealer |
|---|---|---|
| Price Point | Budget-Friendly ($ – $$) | Expensive ($$$ – $$$$) |
| Best For | General home use, solids, meal prep | Liquids, commercial use, high volume |
| Size | Compact, countertop-friendly | Bulky and heavy |
| Ease of Use | Very simple and straightforward | Steeper learning curve |
Your First Seal: A Simple Step-by-Step Guide
Worried it’s complicated? Don’t be. Using a budget vacuum sealer is incredibly easy. I remember my first time; I was a bit nervous, but after one bag of coffee beans, I was sealing everything in sight! Here’s how it usually goes:
- Prepare Your Bag: Use a roll to create a custom-sized bag or grab a pre-cut one. Make sure it’s large enough to hold the food with at least 2-3 inches of extra space at the top.
- Fill the Bag: Place your food item inside the bag. Be careful not to overfill it. Pro tip: Fold the top edge of the bag outward before filling to keep the sealing area clean and dry.
- Position the Bag: Open the lid of your vacuum sealer and carefully place the open end of the bag into the vacuum channel or drip tray. Make sure it’s flat and not creased.
- Lock and Seal: Close the lid firmly until it clicks into place. Most models have buttons for “Vacuum & Seal” or separate “Vacuum” and “Seal” functions. Press the appropriate button.
- Watch the Magic Happen: The machine will whir to life, sucking all the air out. You’ll see the bag shrink tightly around your food. Once all the air is removed, the heat-sealing strip will activate to create a strong, airtight seal.
- Release and Inspect: When the machine’s indicator light turns off, it’s done. Unlock the lid, remove your perfectly sealed bag, and check the seal to ensure it’s solid and complete.
Pro Tips to Seal Like a Seasoned Chef
After you’ve got the basics down, a few simple tricks can take your food preservation game to the next level.
- Double Seal for Security: For long-term freezer storage or liquids, run the “Seal” function a second time to create a stronger, wider seal about a quarter-inch away from the first one.
- Freeze Liquids First: Want to seal soups, stews, or marinades? Pour them into the bag and freeze them upright for a few hours until solid before vacuum sealing. This prevents the liquid from being sucked into the machine.
- The Paper Towel Trick: For particularly moist foods like raw meat or fish, fold a small paper towel and place it inside the bag between the food and the seal area. It will absorb excess moisture without affecting the food.
- Blanch Certain Veggies: Cruciferous vegetables like broccoli, cauliflower, and cabbage release gases that can cause the bag to expand. Briefly blanching them before sealing neutralizes this effect.
- Give Delicate Items Space: For soft items like bread or pastries, use the “Pulse” function (if your model has one) to control the air removal manually, or simply hit the “Seal” button before it crushes your food.
|
Our Picks for the Best Food Vacuum Cealer in 2026
As an Amazon Associate, we earn from qualifying purchases.
|
||
| Num | Product | Action |
|---|---|---|
| 1 | Chef Preserve Compact Vacuum Sealer for Food (Vacuum Sealer Machine + 30 Reusable Vacuum Bags) Powerful Handheld Vacuum Sealer Machine, Seal Meal Saver, Portable Food Sealer |

|
| 2 | NutriChef Automatic Vacuum Air Sealing System for Food Preservation with Starter Kit, Compact Design, Lab Tested, Dry & Moist Food Modes with Led Indicator Lights, Black |
|
| 3 | Nesco Deluxe Food VS-12 Vacuum Sealer, 130 Watts, Kit Bags & Viewing Lid, Compact, Silver |
|
| 4 | Vakumar Liquid Vacuum Sealer Machine, 90Kpa Vacuum Sealer Machine Preservation Dry/Moist/Liquid Modes, LED Indicator Light, Handle Locked Design, Built-in Cutter and Bag Storage, Removable Drip Tray |
|
| 5 | FoodSaver V4400 2-in-1 Vacuum Sealer Machine with Automatic Vacuum Sealer Bag Detection and Starter Kit |
|
| 6 |
|
|
| 7 | FoodSaver Vacuum Sealer Machine, Automatic Bag Detection, Sous Vide Friendly, with sealer bags, roll, handheld vacuum sealer, black |
|
| 8 | Vacuum Sealer Machine Powerful 90Kpa Precision 6-in-1 Compact Food Preservation System with Cutter, 2 Bag Rolls & 5 Pre-cut Bags, Widened 12mm Sealing Strip, Dry&Moist Modes (Silver) |
|
| 9 | SEATAO VH5188 Automatic Vacuum Sealer Machine, 90kPa Multifunction Commercial Vacuum Food Sealer For Food Preservation, Dry & Moist & Food & Extended Modes, LED lights, Double Seal |
|
| 10 | FoodSaver Compact Vacuum Sealer Machine with Airtight Bags and Roll - Ideal for Sous Vide and Airtight Food Storage, White |
|
The Dos and Don’ts: What Should You Vacuum Seal?
While a vacuum sealer is incredibly versatile, not all foods are created equal. Knowing what works and what doesn’t will save you from potential messes and disappointing results.
Foods You Should Definitely Vacuum Seal
- Meats and Fish: Beef, poultry, pork, and fish are perfect candidates. It prevents freezer burn and keeps them fresh for months.
- Hard Cheeses: Say goodbye to moldy cheddar. Vacuum sealing keeps hard cheeses fresh for weeks.
- Dry Goods: Coffee beans, pasta, rice, flour, and nuts stay fresh and protected from pantry pests.
- Fresh Produce: Berries, green beans, carrots, and corn (after blanching) hold up beautifully.
- Pre-made Meals: Seal entire meals for quick and easy weeknight dinners.
Foods You Should Avoid or Seal with Caution
- Soft Cheeses: Cheeses like Brie, Camembert, and blue cheese contain live molds and bacteria that don’t do well in an oxygen-free environment.
- Raw Mushrooms and Garlic: These can ripen or spoil faster in an anaerobic (oxygen-free) setting and can even produce harmful bacteria. It’s better to cook them first.
- Whole Raw Onions: Similar to garlic, they can spoil quickly.
- Cruciferous Vegetables (if not blanched): As mentioned, broccoli, Brussels sprouts, and cabbage need to be blanched first to prevent gas buildup.
How to Find Your Perfect Match in this Budget Vacuum Sealer Review
So, how do you choose the right machine without getting overwhelmed? When conducting your own budget vacuum sealer review, focus on these four key factors.
1. Sealing Power and Consistency
Does the machine have enough suction to remove air effectively? More importantly, does it create a strong, reliable seal every time? Look for reviews that mention the quality of the seal itself. A weak seal defeats the entire purpose.
2. Ease of Use and Cleaning
You’re more likely to use a tool that’s simple and intuitive. Look for one-touch operation, clear indicator lights, and a removable drip tray for easy cleanup. A complicated machine will just end up collecting dust in a cabinet.
3. Size and Portability
How much counter space do you have? Most budget models are designed to be compact, but some are sleeker than others. If you plan to store it away between uses, look for a lightweight and slim design.
4. Bag Compatibility and Cost
Some sealers require you to use their own brand of bags, which can be expensive. The best budget models are compatible with a wide range of third-party bags and rolls, giving you the flexibility to shop around for the best deals.
Frequently Asked Questions About Budget Vacuum Sealers
Are budget vacuum sealers really worth it?
Absolutely. For the average household, a quality budget vacuum sealer provides all the core benefits—extending food life, preventing freezer burn, and saving money—without the high cost of a commercial unit. They are one of the best investments you can make for your kitchen.
Can I reuse vacuum sealer bags?
Yes, you can, with a few caveats. If the bag previously held raw meat, fish, or eggs, you should not reuse it due to the risk of bacterial contamination. For other foods, wash the bag thoroughly with soap and hot water, let it dry completely, and you can trim off the old seal and reuse it.
How long does vacuum-sealed food last in the freezer?
Properly vacuum-sealed food can last 2-3 years in the freezer without any loss of quality, compared to just 6-12 months for food stored in regular freezer bags. This is a massive improvement that prevents waste.
Do I need to buy special bags for my vacuum sealer?
Yes, you must use bags specifically designed for vacuum sealing. These bags have special channels or textures on one side that allow the air to be fully removed before the bag is sealed. Regular plastic bags will not work.
What is the biggest mistake people make with a budget vacuum sealer?
The most common mistake is not leaving enough empty space at the top of the bag. You need at least 2-3 inches of “headspace” for the machine to get a proper grip, remove all the air, and create a clean, strong seal. A messy or wet seal area is the number one cause of seal failure.
Wrapping It Up: Your Key to a Fresher Kitchen
Finding the right kitchen tool can feel like a chore, but hopefully, this budget vacuum sealer review has shown you that saving food, time, and money is well within your reach. You don’t need a top-of-the-line, professional-grade machine to reap the incredible benefits of vacuum sealing. A reliable, affordable model can completely transform the way you shop, cook, and store food. So go ahead, make the investment. Your wallet, your schedule, and your taste buds will thank you for it.