Let’s be real for a second. How much food have you thrown away this month? That half-eaten block of cheese that went fuzzy, the chicken breasts that got freezer-burned into an icy fossil, or the fresh berries that turned to mush in three days. It’s like throwing money straight into the trash. If you’re looking to buy a countertop vacuum sealer under 100, you’re on the right track to changing that. But the big question is, can you actually get a decent machine without breaking the bank? The answer is a resounding yes, and I’m here to show you exactly how to find a budget-friendly workhorse for your kitchen.
So, How Do These Kitchen Gadgets Actually Work?
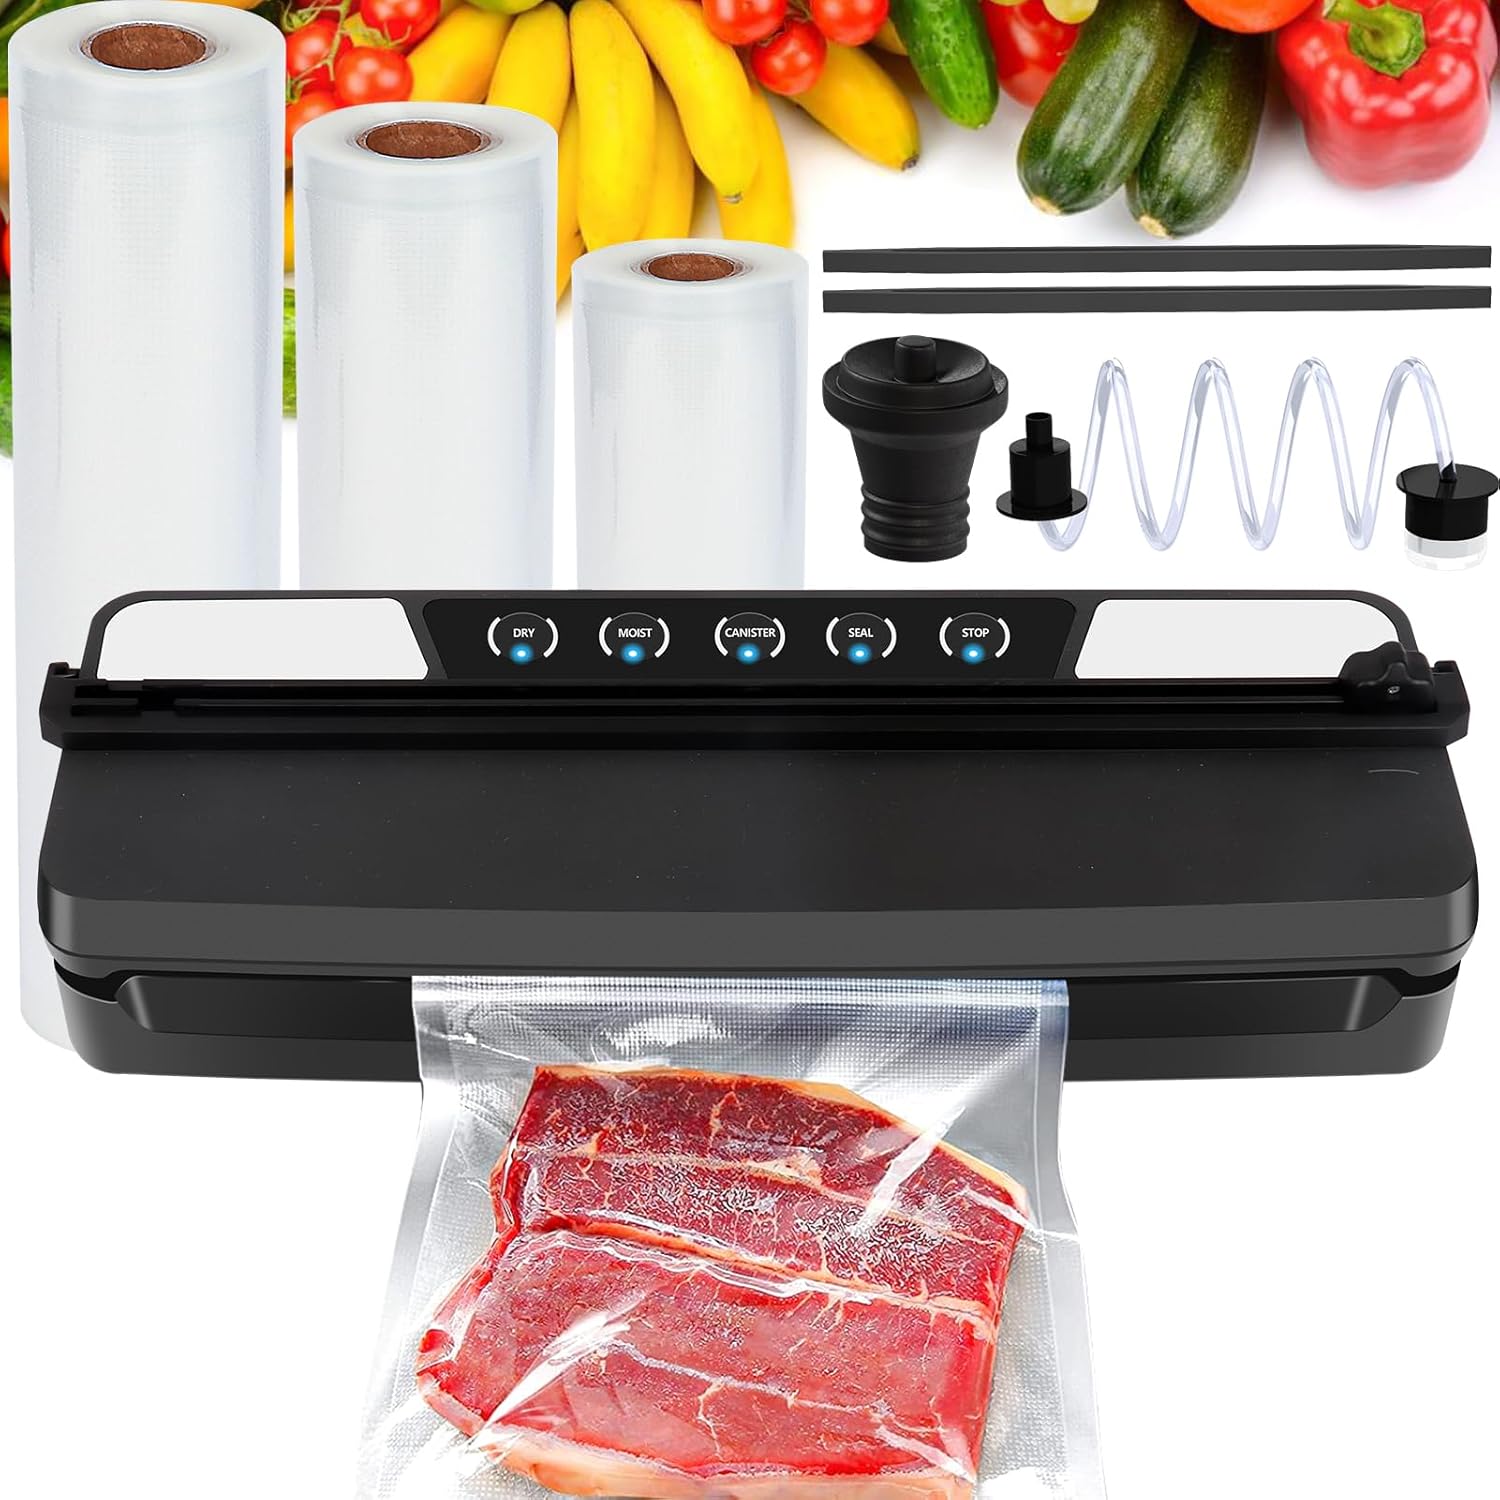
At its core, a vacuum sealer is a brilliantly simple device. Think of it as a tiny, powerful bouncer for your food’s personal space. It kicks out the one guest that ruins every party: oxygen. By removing most of the air from a specially designed bag and then creating an airtight heat seal, it stops the two main culprits of food spoilage—oxidation and microbial growth—dead in their tracks.
The benefits are immediate and, frankly, game-changing:
- Extended Freshness: We’re talking about keeping food fresh up to five times longer than traditional storage methods. That steak can last for months in the freezer instead of weeks.
- Goodbye, Freezer Burn: Freezer burn happens when air comes into contact with frozen food, drawing out moisture and ruining its texture and flavor. An airtight seal makes this a thing of the past.
- Save Big Bucks: You can buy in bulk, take advantage of sales, and preserve leftovers without a second thought. The money you save on wasted food will pay for the machine in no time.
- The Sous Vide Secret Weapon: If you’re into sous vide cooking, a vacuum sealer is non-negotiable. It ensures perfect, water-tight seals for even cooking.
- Marinating in Minutes: The vacuum pressure opens up the pores of meat and fish, allowing marinades to penetrate in as little as 20 minutes instead of hours.
What Are the Main Types of Vacuum Sealers?
When you’re shopping on a budget, you’ll mainly encounter two types of countertop models. Understanding the difference is key to making the right choice.
External (or Suction) Vacuum Sealers
This is the most common type you’ll find, especially when you want to buy a countertop vacuum sealer under 100. You place your food in a bag, put the open end of the bag onto the machine’s sealing strip, close the lid, and it sucks the air out before sealing. They are compact, affordable, and perfect for most home kitchens.
Handheld Vacuum Sealers
These are smaller, cordless devices that work with special zipper bags or containers that have a valve. You just press the handheld unit over the valve, and it sucks the air out. They’re great for delicate items, pantry storage (like cheese and deli meats), and for people with very limited counter space.
For our purposes, we’re focusing on the external sealers, as they offer the most power and versatility for the price.
Your First Sealing Adventure: A Step-by-Step Guide
Using one of these machines is way easier than it looks. I remember my first time—I was a bit intimidated, but after one bag of sealed chicken, I was a convert. Here’s a simple breakdown:
- Prepare Your Food: Make sure your food is clean and dry. If it’s something moist, like raw meat, you can pat it dry with a paper towel. For liquids or very juicy items, it’s a great idea to pre-freeze them for an hour or two.
- Choose Your Bag: Use bags specifically designed for vacuum sealing. They have special channels that allow the air to be pulled out efficiently. Cut the roll to your desired length, leaving at least three inches of extra space at the top.
- Make the First Seal: If you’re using a roll, you’ll need to seal one end to create a bag. Just place one of the open ends on the sealing strip and use the “Seal” function.
- Fill ‘Er Up: Place your food inside the newly made bag. Try not to overfill it.
- Position and Seal: Carefully place the open end of the filled bag onto the machine’s vacuum channel. Make sure it’s flat and has no wrinkles.
- Lock and Load: Close the lid and lock it into place. Most models will have clips or levers on the side that click shut.
- Press the Magic Button: Hit the “Vacuum & Seal” button. The machine will whir to life, suck out all the air, and then the sealing light will indicate it’s creating the final, airtight seal. Once it’s done, it will click or the lights will turn off. Unlock, and admire your perfectly preserved food!
Pro Tips to Seal Like You’ve Been Doing It for Years
Ready to take your food-saving game to the next level? These are the little tricks I’ve learned over the years that make a huge difference.
- The Double Seal: For long-term freezer storage or for anything with a bit of moisture, run the “Seal” function a second time to create an extra-strong, super-secure seal about a quarter-inch away from the first one.
- The Paper Towel Trick: Sealing something moist like ground beef or fish? Fold a small paper towel and place it inside the bag, between the food and where you’ll be sealing. It will catch any excess liquid before it gets sucked into the machine’s vacuum chamber.
- Freeze Liquids First: Don’t even try to vacuum seal pure liquids like soup or broth without freezing them first. Pour them into a container, freeze until solid, then pop the frozen block out and seal it in a bag. [Learn more about preserving soups and stocks here].
- Blanch Your Veggies: For vegetables like broccoli, cauliflower, and cabbage, it’s best to blanch them before sealing. This stops the enzymes that can cause them to spoil and release gas inside the bag.
- Label Everything: You might think you’ll remember what’s in that bag and when you sealed it, but trust me, you won’t. Use a permanent marker to write the contents and the date directly on the bag.
|
Our Picks for the Best Food Vacuum Cealer in 2026
As an Amazon Associate, we earn from qualifying purchases.
|
||
| Num | Product | Action |
|---|---|---|
| 1 | FoodSaver V4400 2-in-1 Vacuum Sealer Machine with Automatic Vacuum Sealer Bag Detection and Starter Kit |

|
| 2 | NutriChef Automatic Vacuum Air Sealing System for Food Preservation with Starter Kit, Compact Design, Lab Tested, Dry & Moist Food Modes with Led Indicator Lights, Black |
|
| 3 | Vacuum Sealer Machine Powerful 90Kpa Precision 6-in-1 Compact Food Preservation System with Cutter, 2 Bag Rolls & 5 Pre-cut Bags, Widened 12mm Sealing Strip, Dry&Moist Modes (Silver) |
|
| 4 | FoodSaver Vacuum Sealer Machine, Automatic Bag Detection, Sous Vide Friendly, with sealer bags, roll, handheld vacuum sealer, black |
|
| 5 |
|
|
| 6 | Chef Preserve Compact Vacuum Sealer for Food (Vacuum Sealer Machine + 30 Reusable Vacuum Bags) Powerful Handheld Vacuum Sealer Machine, Seal Meal Saver, Portable Food Sealer |
|
| 7 | FoodSaver Compact Vacuum Sealer Machine with Airtight Bags and Roll - Ideal for Sous Vide and Airtight Food Storage, White |
|
| 8 | Vakumar Liquid Vacuum Sealer Machine, 90Kpa Vacuum Sealer Machine Preservation Dry/Moist/Liquid Modes, LED Indicator Light, Handle Locked Design, Built-in Cutter and Bag Storage, Removable Drip Tray |
|
| 9 | SEATAO VH5188 Automatic Vacuum Sealer Machine, 90kPa Multifunction Commercial Vacuum Food Sealer For Food Preservation, Dry & Moist & Food & Extended Modes, LED lights, Double Seal |
|
| 10 | Nesco Deluxe Food VS-12 Vacuum Sealer, 130 Watts, Kit Bags & Viewing Lid, Compact, Silver |
|
What Foods Can You Vacuum Seal (And Which Should You Avoid)?
A vacuum sealer is incredibly versatile, but it’s not a magic wand for everything. Knowing what works and what doesn’t will save you from some sad, squishy failures.
| Seal This! | Not That! (Or Seal with Caution) |
|---|---|
| Meats, Poultry & Fish (Raw or Cooked) | Soft Cheeses (e.g., Brie, Camembert) – can crush and spoil. |
| Hard Cheeses (e.g., Cheddar, Parmesan) | Raw Mushrooms – they ripen quickly and can spoil anaerobically. |
| Fruits & Berries (Pre-freeze first) | Whole Raw Onions & Garlic – can release gases and spoil. |
| Blanched Vegetables | Raw Cruciferous Veggies (Broccoli, Cabbage) – must be blanched. |
| Coffee Beans & Nuts | Freshly Cooked, Hot Foods – let them cool completely first. |
| Dried Goods (Flour, Sugar, Pasta) | Delicate Baked Goods – the vacuum pressure will crush them. |
| Leftovers & Pre-made Meals | Liquids – must be frozen solid before sealing. |
How to Choose When You Buy a Countertop Vacuum Sealer Under 100
Okay, this is the main event. You’re ready to pull the trigger, but you’re faced with dozens of options. How do you find the diamond in the rough? Focus on these key features.
- Suction Power: This is the most important factor. Look for a model that has a strong motor. While you won’t get the industrial-strength power of a $500 machine, a good budget model should still provide a tight, reliable vacuum. Check reviews for comments on its power.
- Sealing Strip Width: A wider sealing strip (3mm vs. 1-2mm) provides a more secure and durable seal, offering extra protection against leaks.
- Ease of Use & Cleaning: Look for simple, one-touch controls. A removable drip tray is a lifesaver, making cleanup after sealing moist foods a breeze.
- Modes & Functions: Many affordable models now come with “Moist” and “Dry” food settings, which automatically adjust the sealing process. A “Pulse” function is also fantastic, as it gives you manual control over the vacuum process for delicate items like chips or bread.
- Size and Footprint: Consider how much counter or storage space you have. Some models are surprisingly slim and can be stored vertically.
- Included Accessories: A good starter kit can add a lot of value. Look for models that come with a roll of bag material and a few pre-cut bags so you can start sealing right away.
“When you’re shopping on a budget, don’t just look at the price tag. Look at the value. A reliable seal, a removable drip tray, and a few included bags can make a $70 machine a much better long-term investment than a flimsy $50 one.” – Dr. Evelyn Reed, Food Scientist and Preservation Expert.
Finding a quality sealer in this price range is all about balancing features with performance. You may not get a built-in bag cutter or storage, but you can absolutely find a machine that does its core job—preserving food—exceptionally well.
Frequently Asked Questions About Budget Vacuum Sealers
Can I use any plastic bags with my vacuum sealer?
No, you need to use bags specifically designed for vacuum sealing. These bags have textured channels on one side that allow the air to be completely removed before the bag is sealed. Regular plastic bags will just melt without creating a vacuum.
How much money can you really save with a vacuum sealer?
Studies have shown that the average American family throws out hundreds of dollars worth of food each year. By buying in bulk, preserving leftovers, and eliminating food waste, most users find their vacuum sealer pays for itself within a few months.
Is a vacuum sealer under $100 powerful enough?
Absolutely. While they may not be as fast or feature-rich as premium models, many affordable vacuum sealers have more than enough suction power for everyday household use, from sealing meats for the freezer to preserving dry goods in the pantry.
How do I clean my countertop vacuum sealer?
It’s easy! Always unplug the unit first. For the exterior, just use a damp cloth. The most important part is the vacuum channel and drip tray. If your model has a removable tray, take it out and wash it with warm, soapy water. If not, carefully wipe the channel with a damp paper towel to remove any food residue.
Can you vacuum seal liquids in a budget machine?
Yes, but you have to freeze the liquid first. No countertop suction sealer, regardless of price, is designed to handle large amounts of liquid. Sucking liquid into the motor can damage the machine. Always freeze soups, stocks, and marinades in a container until solid, then seal the frozen block in a bag.
The Final Seal: Is a Budget Sealer Worth It?
Without a doubt. A countertop vacuum sealer is one of the smartest kitchen investments you can make. It’s a tool that actively fights food waste, keeps your food tasting fresh for longer, and saves you serious money in the long run. You don’t need to spend a fortune to get these benefits. By focusing on the core features that matter—suction power, seal quality, and ease of use—you can easily buy a countertop vacuum sealer under 100 that will become an indispensable part of your kitchen routine. So go ahead, start your food-saving journey and enjoy the peace of mind that comes with a well-preserved pantry and freezer.