Walking through the aisles of Costco, it’s easy to get inspired. You see those bulk packages of chicken, the giant bags of coffee beans, and the beautiful cuts of steak, and you think, “I’m going to save so much money!” But then, a week later, you’re staring at freezer-burned meat and wondering where it all went wrong. If this sounds familiar, you’re in the right place. The solution might just be the very next item on your shopping list: a decision to Buy Vacuum Sealer Costco has to offer. This isn’t just another kitchen gadget destined to collect dust. It’s a powerhouse tool for saving money, reducing food waste, and making your food taste better for longer. Let’s dive into everything you need to know to make a smart purchase and become a food preservation pro.
What’s the Big Deal? How a Vacuum Sealer Works Its Magic
So, how does this machine actually work? In short, a vacuum sealer removes the air from a specially designed bag or container and then uses heat to create an airtight seal. It’s that simple, but the science behind it is what makes it so effective.
The primary enemy of fresh food is oxygen. Oxygen fuels the growth of mold, mildew, and bacteria. It also causes oxidation, which is what turns your beautiful green avocados brown and gives frozen foods that dreaded “freezer burn” taste. By removing the vast majority of the air, you’re essentially hitting the pause button on the spoilage process.
“Think of it as creating a personal time capsule for your food,” explains Dr. Elena Vance, a food preservation specialist. “You’re locking in the freshness, flavor, and nutrients at their peak, drastically slowing down the degradation that air and moisture cause.”
The key benefits are hard to ignore:
- Massive Money Savings: Buying in bulk at places like Costco is only a good deal if you use it all. A vacuum sealer lets you take advantage of sales and bulk pricing without the risk of spoilage.
- Drastically Reduced Food Waste: Stop throwing away half-used blocks of cheese or browned leftovers. Sealing them can extend their life by up to 5 times longer than traditional storage methods.
- Superior Flavor and Quality: Food protected from air retains its moisture, texture, and flavor. Say goodbye to icy, tasteless chicken breasts from the back of the freezer.
- Supercharged Meal Prepping: Portion out meals for the week, seal them, and they’ll be just as fresh on Friday as they were on Sunday. It’s also a game-changer for marinating, as the vacuum pressure helps the marinade penetrate meat more quickly and deeply.
- Perfect Partner for Sous Vide: If you’re into sous vide cooking, a vacuum sealer is non-negotiable for achieving that perfect, evenly-cooked result.
What Kinds of Vacuum Sealers Will I Find at Costco?
While specific models change with the seasons, Costco typically stocks one of the most common and user-friendly types of vacuum sealers: the external or “edge” sealer. Let’s break down what you’re likely to encounter.
External (Edge) Vacuum Sealers
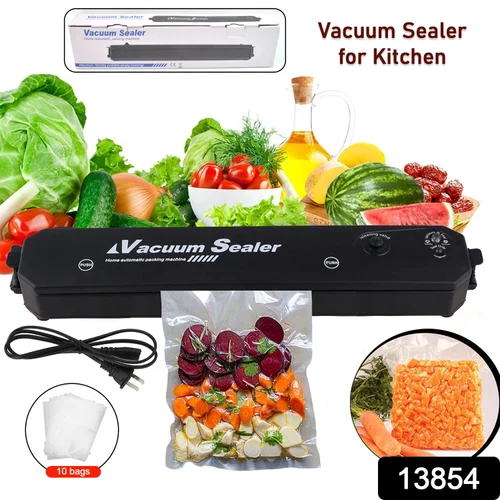
This is the workhorse of home vacuum sealing and the type you’ll almost certainly see when you buy vacuum sealer Costco models. You place the open end of a special, textured bag onto the machine’s sealing strip, close the lid, and the machine sucks the air out from the opening before sealing it shut.
- Pros: They are generally more affordable, compact, and incredibly easy to use, making them perfect for most home kitchens. They handle everything from dry goods like nuts and coffee to solid proteins and vegetables.
- Cons: They can be a bit tricky with very liquid-heavy foods like soups or stews, as the vacuum can sometimes pull liquid into the machine. (Don’t worry, we have a trick for that later!)
Handheld Vacuum Sealers
Occasionally, you might see smaller, handheld units bundled with special reusable bags or containers. These are great for short-term storage of things you access frequently, like deli meats, cheese, or leftovers in the fridge. They are less powerful than their countertop cousins and not ideal for long-term freezer storage, but they offer great convenience.
Your First Sealing Mission: A Step-by-Step Guide
You’ve brought your new machine home. Now what? Don’t be intimidated! Using it is a piece of cake.
- Prepare Your Bag: Use the rolls that often come with the sealer to create a custom-sized bag, or grab a pre-cut one. Make sure you leave at least 3-4 inches of empty space at the top for a good seal.
- Fill the Bag: Place your food item inside. Try to keep the sealing area at the top of the bag clean and dry. Any food residue or moisture can prevent a perfect seal.
- Position the Bag: Open the lid of your vacuum sealer and place the open end of the bag flat across the sealing bar, inside the designated vacuum channel.
- Lock and Load: Close the lid firmly until it clicks and locks into place.
- Press the Button: Most models have a simple “Vacuum & Seal” button. Press it and watch the magic happen! The machine will suck out the air, and you’ll see the bag shrink tightly around your food. Once the vacuum process is complete, the heat strip will automatically engage to seal the bag.
- Release and Inspect: When the machine’s indicator light turns off, it’s done. Unlock and open the lid. Check the seal—it should be a clear, solid line with no wrinkles or gaps. If it’s not perfect, simply cut it off and try again.
Pro Tips and Tricks for Sealing Like a Champion
Ready to level up? These tips, learned from years of sealing just about everything in my kitchen, will help you avoid common mistakes and get the most out of your machine.
- The Pre-Freeze Trick for Liquids: Want to seal soup, stews, or saucy marinades? Pour them into the bag, stand the bag upright in the freezer for 1-2 hours until the liquid is solid, then vacuum seal it. No mess, perfect seal.
- Protect Against Sharp Edges: Sealing items with sharp bones (like a T-bone steak) or hard pasta can puncture the bag. Simply fold a small piece of paper towel and place it over the sharp edge before sealing.
- Give Delicate Foods Some Space: For soft items like bread or pastries, you don’t want to crush them. Use the “Pulse” function if your model has one, which gives you manual control over the vacuum. If not, hit the “Seal” button manually just before it gets too tight.
- Double Up for a Better Seal: For foods going into the freezer for a long time or for sous vide cooking, I always recommend a double seal. Just run the sealing function a second time about a quarter-inch away from the first seal for extra insurance.
- Keep It Clean: Wipe down the sealing strip and the vacuum channel after each use, especially if you’re sealing moist foods. A clean machine is a happy, effective machine.
|
Our Picks for the Best Food Vacuum Cealer in 2026
As an Amazon Associate, we earn from qualifying purchases.
|
||
| Num | Product | Action |
|---|---|---|
| 1 | Vakumar Liquid Vacuum Sealer Machine, 90Kpa Vacuum Sealer Machine Preservation Dry/Moist/Liquid Modes, LED Indicator Light, Handle Locked Design, Built-in Cutter and Bag Storage, Removable Drip Tray |

|
| 2 | FoodSaver Vacuum Sealer Machine, Automatic Bag Detection, Sous Vide Friendly, with sealer bags, roll, handheld vacuum sealer, black |
|
| 3 | FoodSaver Compact Vacuum Sealer Machine with Airtight Bags and Roll - Ideal for Sous Vide and Airtight Food Storage, White |
|
| 4 | Vacuum Sealer Machine Powerful 90Kpa Precision 6-in-1 Compact Food Preservation System with Cutter, 2 Bag Rolls & 5 Pre-cut Bags, Widened 12mm Sealing Strip, Dry&Moist Modes (Silver) |
|
| 5 | FoodSaver V4400 2-in-1 Vacuum Sealer Machine with Automatic Vacuum Sealer Bag Detection and Starter Kit |
|
| 6 |
|
|
| 7 | NutriChef Automatic Vacuum Air Sealing System for Food Preservation with Starter Kit, Compact Design, Lab Tested, Dry & Moist Food Modes with Led Indicator Lights, Black |
|
| 8 | SEATAO VH5188 Automatic Vacuum Sealer Machine, 90kPa Multifunction Commercial Vacuum Food Sealer For Food Preservation, Dry & Moist & Food & Extended Modes, LED lights, Double Seal |
|
| 9 | Chef Preserve Compact Vacuum Sealer for Food (Vacuum Sealer Machine + 30 Reusable Vacuum Bags) Powerful Handheld Vacuum Sealer Machine, Seal Meal Saver, Portable Food Sealer |
|
| 10 | Nesco Deluxe Food VS-12 Vacuum Sealer, 130 Watts, Kit Bags & Viewing Lid, Compact, Silver |
|
To Seal or Not to Seal: The Definitive Food List
While you can seal almost anything, some foods require a little extra prep, and a few should be avoided altogether.
Foods That Are Perfect for Sealing:
- Proteins: Beef, poultry, fish, and pork are superstars. Perfect for long-term freezer storage.
- Hard Cheeses: Prevents mold and keeps them from drying out.
- Dry Goods: Coffee beans, nuts, flour, sugar, and pasta stay fresh and pest-free.
- Hard Fruits & Vegetables: Carrots, green beans, apples, and berries (freeze berries on a tray first so they don’t get squished).
- Prepared Meals & Leftovers: An absolute game-changer for meal prep.
Foods That Require Caution or Prep:
- Cruciferous Vegetables (Broccoli, Cabbage, Cauliflower): These vegetables release gases as they age, which can cause the bag to expand. To seal them safely, you must blanch them first (a quick dip in boiling water, then an ice bath).
- Soft Cheeses & Dairy: Cheeses like Brie or Camembert don’t do well, as their texture and ripening process are affected.
- Garlic & Onions: Similar to cruciferous veggies, they release gases. It’s best to use them fresh or cook them before sealing.
- Mushrooms: Raw mushrooms can decay quickly due to anaerobic bacteria. It’s best to cook them before sealing.
How to Choose the Right Machine When You Buy Vacuum Sealer Costco
Standing in the aisle, you might see one or two options. How do you decide? Focus on these key features.
- Motor Strength and Suction Power: This is the heart of the machine. A stronger motor will provide a faster, more reliable vacuum.
- Sealing Bar Width: A wider sealing bar (some are double-width) creates a more secure, fail-proof seal. This is especially important for long-term storage.
- Special Features: Look for handy extras like a built-in bag cutter, a roll storage compartment, an accessory port for sealing containers, and different settings for “Moist” and “Dry” foods. The “Moist” setting extends the sealing time to ensure a strong seal even if a little moisture is present.
- Ease of Cleaning: A removable drip tray is a lifesaver. It catches any accidental overflow and makes cleanup a breeze.
- Included Starter Kit: Most Costco bundles are great because they come with a starter kit of bags and rolls, so you can start sealing right out of the box.
Frequently Asked Questions
Can I reseal chip bags or cereal bags with a vacuum sealer?
Yes, but only using the “Seal” function. Don’t use the vacuum function, as it will crush the contents! Just place the original bag on the heat strip and use the manual seal button to create a new, airtight closure.
Are the vacuum sealer bags reusable?
Yes, they can be! If you’ve sealed dry goods, you can wash the bags with warm, soapy water, let them dry completely, and reuse them. However, for safety, never reuse bags that have held raw meat, fish, or greasy foods.
How much longer does vacuum-sealed food really last?
It’s a huge difference. For example, chicken or beef that might last 6 months in the freezer using a standard freezer bag can last 2-3 years when vacuum sealed. In the fridge, cheese that might mold in 1-2 weeks can last 1-2 months.
What’s the main difference between a FoodSaver brand sealer and other brands at Costco?
FoodSaver is one of the most well-known brands and a pioneer in the industry, so they often have a reputation for reliability and feature-rich models. However, other brands offered at Costco are typically vetted for quality and value. Your best bet is to compare the specific features of the models available during your visit.
Do I have to buy the expensive name-brand bags?
While the manufacturer will always recommend their own bags, many generic or third-party vacuum sealer bags work just as well and can save you money. Just make sure they are compatible and designed for vacuum sealing (they need to have a textured side to allow air to be pulled out).
The Final Seal of Approval
Making the decision to buy vacuum sealer Costco offers is more than just a purchase; it’s an investment in your kitchen, your budget, and your time. It’s a simple tool that empowers you to fight back against food waste, lock in peak freshness, and unlock new culinary possibilities from meal prep to sous vide. By understanding how it works and what to look for, you can walk into that store with confidence, knowing you’re choosing a gadget that will pay for itself time and time again. So go ahead, embrace the bulk buy, and get ready to enjoy fresher food for longer.