Let’s be honest, you’ve dived headfirst into the world of sous vide cooking. You’ve perfected the temperature for that mind-blowing medium-rare steak and you’ve marveled at the tenderest chicken breast you’ve ever made. But you keep running into that one, slightly annoying snag: the plastic bag. You’re wrestling with the water displacement method, trying to get every last bubble of air out, and your bag still insists on floating. This is where a proper Sous Vide Vacuum Sealer Review becomes not just helpful, but essential. A quality vacuum sealer is the difference between good sous vide and unforgettable sous vide. It’s the key that unlocks next-level consistency, flavor, and convenience.
So, are you ready to stop fighting with floating bags and start cooking like a true pro? We’re about to break down everything you need to know about choosing and using the perfect vacuum sealer for your sous vide adventures. For those just starting their journey, it’s worth understanding the broader landscape of options available, and a great place to begin is by looking at the best food vacuum sealer 2025 to get a sense of the top contenders on the market.
Why Bother with a Vacuum Sealer for Sous Vide Anyway?
You might be thinking, “I’ve gotten by with Ziploc bags, what’s the big deal?” It’s a fair question. The water displacement method is a decent starting point, but a vacuum sealer is a massive upgrade. Think of it like this: cooking with a Ziploc bag is like wearing a baggy raincoat in a pool. Sure, it keeps you mostly dry, but it’s clumsy. A vacuum-sealed bag is like a perfectly fitted wetsuit—it ensures maximum, direct contact everywhere.
A vacuum sealer’s primary job is to remove air from the bag before sealing it tight. For sous vide, this is critical for two reasons:
- Flawless Heat Transfer: Air is a terrible conductor of heat. Any air pockets between your food and the bag create insulated spots, leading to uneven cooking. By removing all the air, you ensure the warm water is in direct contact with the entire surface of your food, guaranteeing that edge-to-edge perfection sous vide is famous for.
- No More Floating: This is the big one. A bag with even a little bit of air in it will be buoyant, causing it to float to the surface of your water bath. A floating bag means part of your food isn’t submerged and isn’t cooking at the target temperature. A vacuum-sealed bag sinks and stays put.
The benefits don’t stop there. You get deeper flavor infusion from marinades, you can prep and freeze perfectly portioned, ready-to-cook meals, and you completely eliminate the risk of freezer burn.
The Two Main Contenders: Edge vs. Chamber Sealers
When you start shopping, you’ll quickly see two main types of machines. Understanding the difference is key to avoiding buyer’s remorse.
The Everyday Champion: Edge (or Suction) Sealers
This is the kind you’ve most likely seen in home kitchens. You place the open end of a special textured bag into the machine’s channel, close the lid, and it sucks the air out before heat-sealing the edge.
- Pros:
- Affordable: They are significantly cheaper than chamber sealers.
- Compact: They don’t take up much counter space.
- Widely Available: You can find them almost anywhere.
- Cons:
- The Arch-Nemesis: Liquids. Because they work by suction, they have a tendency to pull liquids out of the bag along with the air. Sealing a juicy marinade can be a messy, frustrating experience that often results in a weak seal.
The Pro-Level Powerhouse: Chamber Sealers
Chamber sealers are what you’ll find in professional kitchens. Instead of just placing the bag’s opening in the machine, you place the entire bag inside a chamber. The machine then removes the air from the entire chamber, which equalizes the pressure inside and outside the bag. Because there’s no pressure difference, the liquid stays put right where it belongs—in the bag. Once the air is gone, a sealing bar seals the bag, and then the air is let back into the chamber.
- Pros:
- Masters of Liquids: You can seal bags of soup, stocks, and heavy marinades without spilling a drop.
- Stronger, More Consistent Vacuum: They generally pull a more powerful and reliable vacuum.
- Cheaper Bags: The smooth-sided bags they use are much less expensive than the textured bags required for edge sealers.
- Cons:
- The Price Tag: They are a significant investment.
- The Footprint: They are large, heavy, and will command a permanent spot on your countertop.
Your Step-by-Step Guide to the Perfect Sous Vide Seal
Alright, let’s roll up our sleeves and get it done. Assuming you’re using a standard edge sealer, here’s how to get a perfect seal every time.
- Prep Your Food: Pat your protein dry. This is especially important for getting a good sear later. If you’re using a marinade, now’s the time to add it.
- Choose Your Bag: Grab a vacuum sealer bag that’s large enough to hold your food with at least 3-4 inches of empty space at the top.
- Fold the Opening: Before placing your food inside, fold over the top edge of the bag by an inch or two, creating a cuff. This keeps the sealing area clean from any food juices or marinade, which is crucial for a strong seal.
- Place the Food: Carefully slide your food into the bag, then unfold the cuff.
- Position and Seal: Place the open end of the bag into the vacuum channel of your sealer, making sure it’s flat and wrinkle-free. Close the lid and start the vacuum and seal process.
- The Pro Move: Double Seal: For extra insurance, especially on long cooks, make a second seal about a quarter-inch away from the first one. Most machines have a “seal only” function for this.
Pro Tips to Level Up Your Sealing Game
Ready to move from amateur to expert? These little tricks, gathered from my own kitchen mishaps and triumphs, make a huge difference.
- The Pre-Freeze Trick: Dealing with a very wet marinade or liquid? Pour it into the bag with your food and place the bag upright in the freezer for 30-60 minutes, just until the liquid gets slushy. This prevents the sealer from sucking it out.
- The Paper Towel Barrier: For very juicy items like ground meat or fish, fold a small strip of paper towel and place it inside the bag between the food and the area you’re going to seal. It will absorb excess moisture before it reaches the machine.
- Don’t Overfill: Resist the temptation to cram too much into one bag. It can lead to a poor vacuum and a failed seal. Always leave plenty of headspace.
- Cool It Down: Never try to vacuum seal hot foods. Steam can interfere with the vacuum pump and prevent a proper seal. Let cooked foods cool down in the fridge first.
|
Our Picks for the Best Food Vacuum Cealer in 2026
As an Amazon Associate, we earn from qualifying purchases.
|
||
| Num | Product | Action |
|---|---|---|
| 1 | NutriChef Automatic Vacuum Air Sealing System for Food Preservation with Starter Kit, Compact Design, Lab Tested, Dry & Moist Food Modes with Led Indicator Lights, Black |

|
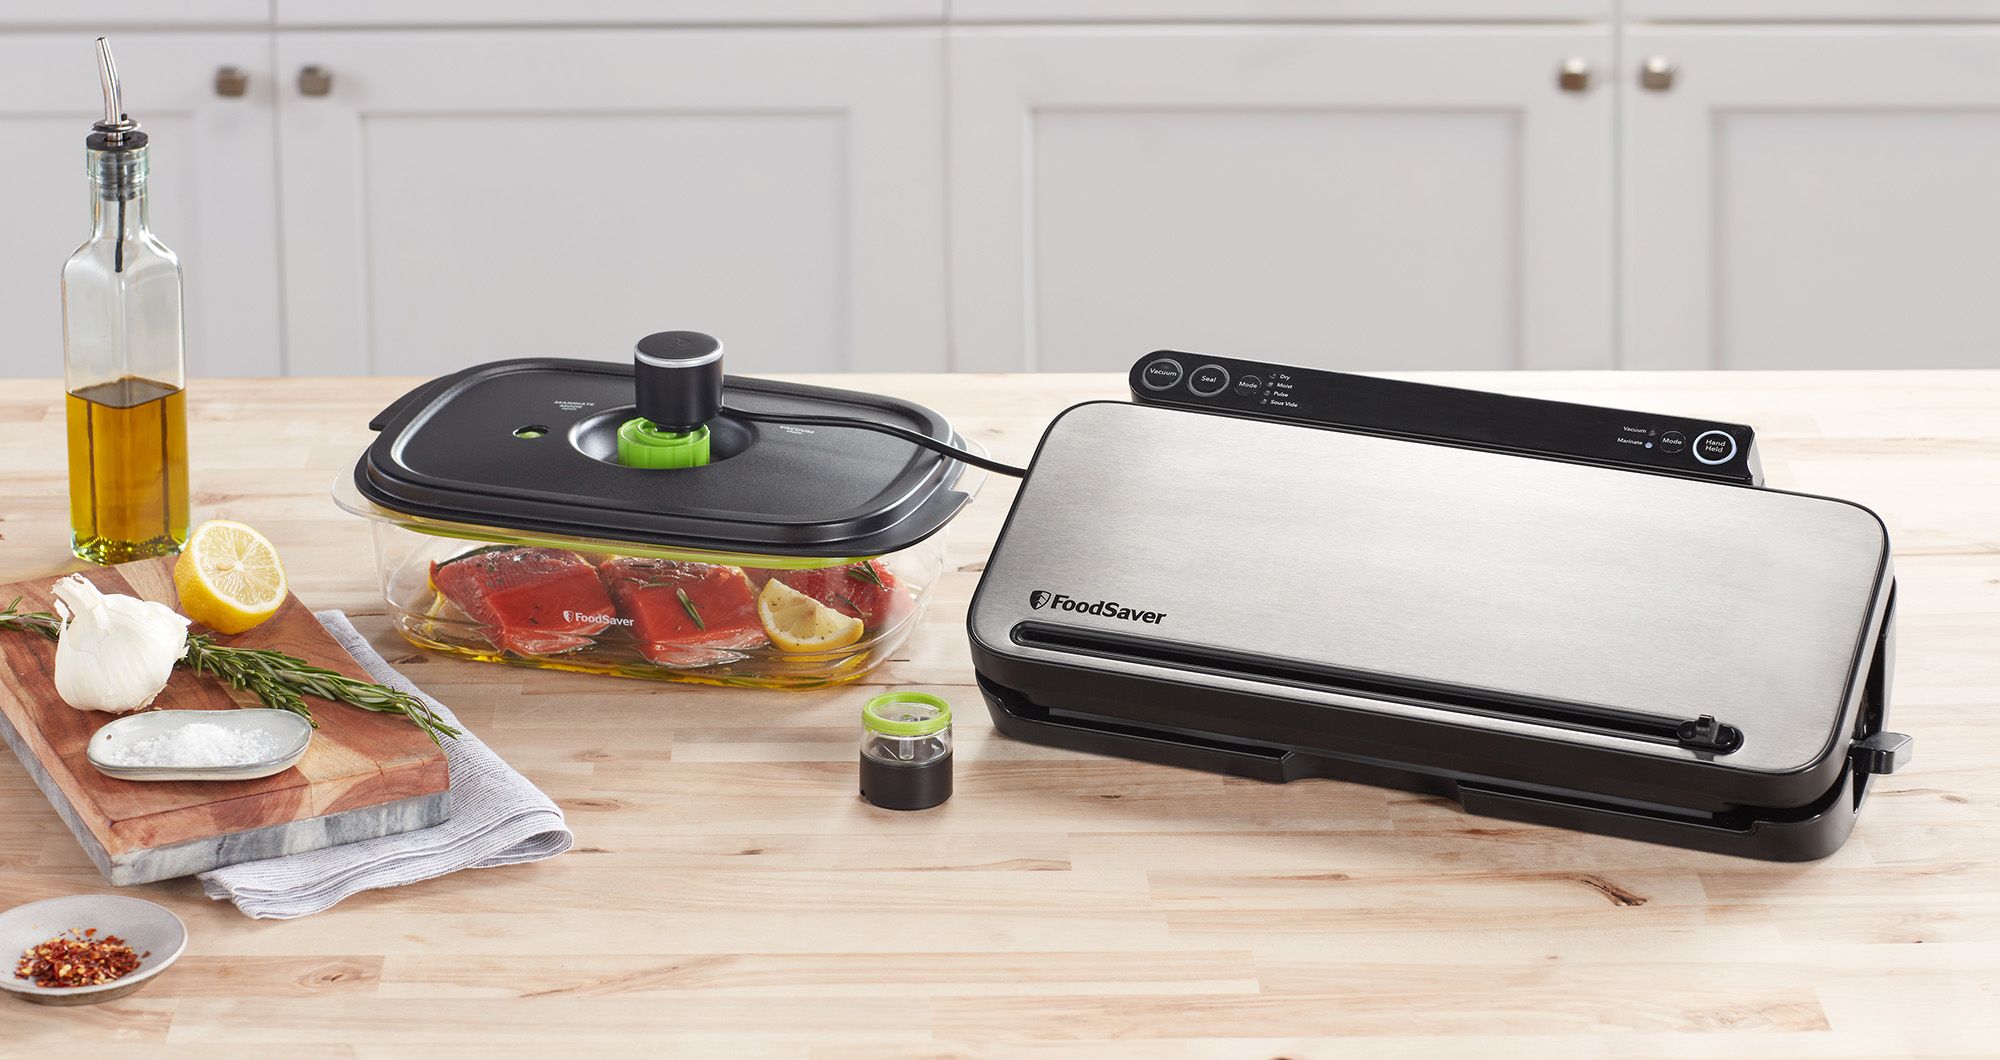
| 2 | FoodSaver Vacuum Sealer Machine, Automatic Bag Detection, Sous Vide Friendly, with sealer bags, roll, handheld vacuum sealer, black |
|
| 3 |
|
|
| 4 | Vakumar Liquid Vacuum Sealer Machine, 90Kpa Vacuum Sealer Machine Preservation Dry/Moist/Liquid Modes, LED Indicator Light, Handle Locked Design, Built-in Cutter and Bag Storage, Removable Drip Tray |
|
| 5 | Vacuum Sealer Machine Powerful 90Kpa Precision 6-in-1 Compact Food Preservation System with Cutter, 2 Bag Rolls & 5 Pre-cut Bags, Widened 12mm Sealing Strip, Dry&Moist Modes (Silver) |
|
| 6 | Chef Preserve Compact Vacuum Sealer for Food (Vacuum Sealer Machine + 30 Reusable Vacuum Bags) Powerful Handheld Vacuum Sealer Machine, Seal Meal Saver, Portable Food Sealer |
|
| 7 | FoodSaver Compact Vacuum Sealer Machine with Airtight Bags and Roll - Ideal for Sous Vide and Airtight Food Storage, White |
|
| 8 | SEATAO VH5188 Automatic Vacuum Sealer Machine, 90kPa Multifunction Commercial Vacuum Food Sealer For Food Preservation, Dry & Moist & Food & Extended Modes, LED lights, Double Seal |
|
| 9 | Nesco Deluxe Food VS-12 Vacuum Sealer, 130 Watts, Kit Bags & Viewing Lid, Compact, Silver |
|
| 10 | FoodSaver V4400 2-in-1 Vacuum Sealer Machine with Automatic Vacuum Sealer Bag Detection and Starter Kit |
|
The Good, The Bad, and The Gassy: What to Vacuum Seal
While a vacuum sealer is incredibly versatile, not everything is a great candidate for it. Knowing the difference will save you from some funky smells and disappointing results.
The A-List: Go for It!
- Proteins: Steaks, chops, chicken breasts, fish fillets. This is the machine’s bread and butter.
- Hard Vegetables: Carrots, potatoes, asparagus, and root vegetables do wonderfully.
- Hard Cheeses: Vacuum sealing extends their life significantly.
- Meal Prep: Portion out grains, sauces, and pre-cooked meals for easy weeknight dinners.
The ‘Handle with Care’ List
These foods can be sealed, but with a crucial extra step. Raw cruciferous vegetables (broccoli, cauliflower, cabbage, Brussels sprouts) and alliums (onions, garlic) release gases as they sit, which will cause the bag to inflate and spoil the food.
As professional chef Julian Petrov notes, “Blanching is your best friend here. A quick dip in boiling water followed by an ice bath neutralizes the enzymes that cause gas production. It’s a non-negotiable step for long-term storage of these specific vegetables.”
Similarly, soft cheeses and fresh mushrooms can be crushed or have their texture ruined by a strong vacuum. Use the “pulse” function if your machine has one to control the pressure.
How Do I Choose the Right Sous Vide Vacuum Sealer?
This is the million-dollar question. The perfect machine for you depends entirely on your needs. Ask yourself these questions to find your match in this sous vide vacuum sealer review.
What’s Your Budget?
This is the first and most important filter. Edge sealers can range from very affordable to mid-tier. Chamber sealers are a significant step up. For those just starting out and looking for a budget-friendly option, exploring the best vacuum sealer under 50 can be a great first step into the world of vacuum sealing without breaking the bank.
What Are You Cooking Most Often?
Be honest. If you’re primarily cooking steaks, chicken, and pork chops, a quality edge sealer will serve you beautifully 95% of the time. If you dream of sous vide French onion soup, poaching fish in a delicate broth, or using complex marinades for every meal, you will be much, much happier saving up for a chamber sealer.
How Much Kitchen Space Do You Have?
An edge sealer can be tucked away in a drawer or cabinet. A chamber sealer is a permanent countertop resident. Measure your space before you even think about clicking “buy.”
What Features Actually Matter?
Look for these key features on an edge sealer:
- Wet/Dry Food Settings: This adjusts the sealing time and vacuum strength.
- Pulse Mode: Gives you manual control over the vacuum process, essential for delicate items.
- Accessory Port: Allows you to use attachments to seal canisters and other containers.
Frequently Asked Questions
Can I use any vacuum sealer for sous vide?
Yes, technically any vacuum sealer is better than no vacuum sealer. However, models with wet/dry settings and a strong, reliable seal are far better suited for the moist environment of sous vide cooking.
Do I really need a vacuum sealer for sous vide?
You don’t need one to start, as the water displacement method works. But if you get serious about sous vide, a vacuum sealer provides more consistent results, better flavor, and far more convenience. It’s the single biggest upgrade you can make to your setup.
What’s the best vacuum sealer for liquids for sous vide?
Hands down, a chamber vacuum sealer is the best for liquids. It can seal a bag of pure soup without spilling a drop. For edge sealers, the best you can do is use one with a good “wet” setting and employ the pre-freezing trick.
Can you reuse sous vide vacuum bags?
It’s generally not recommended for food safety reasons, especially if the bag held raw meat, poultry, or fish. Bacteria can be difficult to clean from the plastic. If you’ve only used it for something like vegetables, you can wash it thoroughly, but it’s often more trouble than it’s worth.
Why is my sous vide bag floating?
It’s floating because there’s still air trapped inside. This could be from an incomplete vacuum, a weak seal that is leaking, or from vegetables that are releasing gas during the cook (like broccoli). Check your seal, and if needed, you can weigh the bag down with a clip or place a heavy spoon inside the bag (away from the seal area) before sealing.
The Final Seal
Making the leap to a dedicated vacuum sealer is a true game-changer for any sous vide enthusiast. It streamlines your process, elevates your results, and opens up a whole new world of meal prep and food preservation possibilities. By understanding the different types of machines and how they work, you can confidently choose the right tool for your kitchen. This sous vide vacuum sealer review is your guide to making that choice. Now go forth, seal with confidence, and cook something amazing.