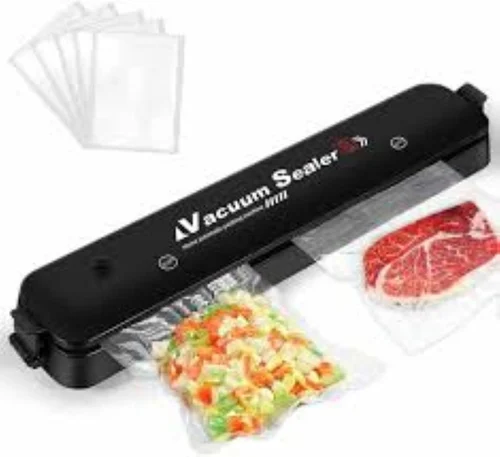
Finding the right kitchen gadget can feel like a quest, especially when you’re on a budget. If you’re looking to seriously level up your food preservation game, you’ve probably heard the whispers about chamber vacuum sealers. But then you see the price tags and think, “no way.” Well, I’m here to tell you it’s entirely possible to buy a chamber vacuum sealer under 300 dollars that will absolutely transform your kitchen. Forget what you think you know; this guide will walk you through everything, making you a savvy shopper and a food-saving pro. Let’s dive in and demystify how you can get professional-grade sealing power without breaking the bank.
Why a Chamber Sealer? The Million-Dollar Question (on a Budget)
So, what’s all the fuss about? You’ve seen those regular suction sealers everywhere. Why go for a chamber model? The magic isn’t in sucking the air out; it’s about changing the pressure around it.
Think of it this way: with a standard suction sealer, you place the open end of the bag in the machine, and it literally sucks the air out. This is great for solid items, but try that with a bag of soup, and you’ll have a disastrous mess. A chamber vacuum sealer works differently. You place the entire bag (open and all) inside a chamber. The machine then removes the air from the entire chamber, including the inside of the bag. This equalizes the pressure, so liquids stay put. Once all the air is gone, a heat bar seals the bag shut, and only then is the air let back into the chamber. The outside pressure then crushes the bag tight around the food.
The key benefits at any price point, including for a model under $300, are game-changing:
- Seal Liquids with Ease: This is the number one reason people upgrade. Soups, stews, marinades, sauces, and stocks can be sealed perfectly with zero mess. This is a complete non-starter for most suction sealers.
- A More Reliable, Professional Seal: Because the process isn’t fighting against the vacuum to seal, you get a much stronger, more consistent, and wider seal. This means less risk of seal failure in the freezer or during a sous vide cook.
- Cheaper Bags: This is a huge long-term win! Chamber sealer bags are simple pouches without the special texture needed for suction sealers. They often cost a fraction of the price, meaning the machine starts paying for itself over time.
- Beyond Sealing: You can use a chamber sealer for rapid-infusing flavors into oils or alcohols, quick-pickling vegetables, and even compressing foods like watermelon for a unique texture.
Chamber vs. Suction Sealers: The Main Event
To really understand the value when you buy a chamber vacuum sealer under 300, it helps to see a head-to-head comparison.
| Feature | Chamber Vacuum Sealer | Suction (Edge) Vacuum Sealer |
|---|---|---|
| Sealing Liquids | Excellent. The core strength. No problem with soups, marinades, etc. | Poor to Impossible. Often requires pre-freezing liquids, which is a hassle. |
| Bag Cost | Low. Uses simple, smooth-sided pouches. | High. Requires special textured or embossed bags to create air channels. |
| Seal Quality | Superior. Typically a wider, more robust and consistent seal. | Good, but prone to failure. Moisture or wrinkles can easily cause a bad seal. |
| Initial Cost | Higher (but affordable options under $300 now exist). | Generally lower, with many models under $100. |
| Size & Weight | Larger and heavier. Requires dedicated counter space. | Smaller and more portable. Easy to store in a cabinet. |
| Versatility | High. Can be used for infusions, pickling, and compressing. | Limited primarily to sealing dry and solid foods. |
How to Use Your New Budget-Friendly Chamber Sealer
Okay, you’ve made the leap and found a great deal. Now what? Using a chamber sealer is incredibly straightforward.
- Prep Your Food: Place your food—whether it’s a steak, a portion of chili, or chopped vegetables—into a chamber vacuum pouch. Be sure to leave a few inches of headspace at the top.
- Position the Bag: Lay the bag flat inside the chamber with the open end draped over the seal bar. A small wire clip usually holds the bag in place. Make sure the opening is clean and free of any moisture or food particles.
- Close the Lid: Firmly close the lid of the machine. This will initiate the vacuum process on most models.
- Set the Controls: Depending on your machine, you’ll set the vacuum time and the seal time. For most foods, the default settings work well. For very wet items, you might increase the vacuum time slightly.
- Let the Machine Work: You’ll hear the pump kick on and see the pressure gauge (if it has one) change. The lid will be held down by the vacuum. Once the vacuum cycle is complete, the seal bar will heat up and seal the bag.
- The “Whoosh”: After sealing, the machine will release the vacuum, and you’ll hear a whoosh of air as it re-pressurizes the chamber. The lid will pop open, and you can remove your perfectly sealed package.
It’s a simple, satisfying process that takes less than a minute from start to finish.
Pro Tips for Your Sub-$300 Chamber Sealer
After testing dozens of machines over the years, I’ve picked up a few tricks, especially for more budget-friendly models. These tips will help you get the most out of your investment.
- Don’t Overfill Your Bags: This is the most common mistake. Leaving at least 2-3 inches of headspace ensures a clean, strong seal and prevents liquid from bubbling over during the vacuum process.
- Double Seal for Long Hauls: If you’re planning on deep-freezing something for a year or doing a multi-day sous vide cook, run a second seal cycle. Just move the bag slightly and seal it again right next to the first seal for extra insurance.
- Keep the Seal Bar Clean: After each session, wipe down the seal bar and the inside of the chamber with a damp cloth. Any food residue can compromise the quality of future seals.
- Pre-Cool Hot Liquids: While you can seal warm liquids, it’s best to let very hot soups or stocks cool down a bit first. Hot liquids can boil under a vacuum, which can affect the seal and the food’s texture.
|
Our Picks for the Best Food Vacuum Cealer in 2026
As an Amazon Associate, we earn from qualifying purchases.
|
||
| Num | Product | Action |
|---|---|---|
| 1 | NutriChef Automatic Vacuum Air Sealing System for Food Preservation with Starter Kit, Compact Design, Lab Tested, Dry & Moist Food Modes with Led Indicator Lights, Black |

|
| 2 | SEATAO VH5188 Automatic Vacuum Sealer Machine, 90kPa Multifunction Commercial Vacuum Food Sealer For Food Preservation, Dry & Moist & Food & Extended Modes, LED lights, Double Seal |
|
| 3 | Chef Preserve Compact Vacuum Sealer for Food (Vacuum Sealer Machine + 30 Reusable Vacuum Bags) Powerful Handheld Vacuum Sealer Machine, Seal Meal Saver, Portable Food Sealer |
|
| 4 |
|
|
| 5 | FoodSaver Vacuum Sealer Machine, Automatic Bag Detection, Sous Vide Friendly, with sealer bags, roll, handheld vacuum sealer, black |
|
| 6 | FoodSaver V4400 2-in-1 Vacuum Sealer Machine with Automatic Vacuum Sealer Bag Detection and Starter Kit |
|
| 7 | Nesco Deluxe Food VS-12 Vacuum Sealer, 130 Watts, Kit Bags & Viewing Lid, Compact, Silver |
|
| 8 | FoodSaver Compact Vacuum Sealer Machine with Airtight Bags and Roll - Ideal for Sous Vide and Airtight Food Storage, White |
|
| 9 | Vacuum Sealer Machine Powerful 90Kpa Precision 6-in-1 Compact Food Preservation System with Cutter, 2 Bag Rolls & 5 Pre-cut Bags, Widened 12mm Sealing Strip, Dry&Moist Modes (Silver) |
|
| 10 | Vakumar Liquid Vacuum Sealer Machine, 90Kpa Vacuum Sealer Machine Preservation Dry/Moist/Liquid Modes, LED Indicator Light, Handle Locked Design, Built-in Cutter and Bag Storage, Removable Drip Tray |
|
What Foods Can You Seal (And What Should You Avoid)?
A chamber vacuum sealer is incredibly versatile, but not everything is a good candidate for sealing.
Foods You Should Absolutely Vacuum Seal:
- Proteins: Raw and cooked meats, poultry, and fish. It dramatically prevents freezer burn.
- Liquids: Soups, stocks, stews, sauces, and marinades are perfect.
- Hard Cheeses: Prevents mold and drying out, extending life by weeks or months.
- Vegetables (Blanched): Blanching vegetables like broccoli, green beans, and asparagus before sealing deactivates enzymes that cause them to degrade.
- Bulk Dry Goods: Flour, sugar, rice, pasta, and coffee beans stay fresh much longer.
- Pre-made Meals: Perfect for meal prepping and portion control.
Foods to Be Cautious With or Avoid:
- Cruciferous Vegetables (Raw): Raw broccoli, cauliflower, cabbage, and Brussels sprouts release gases as they age. Sealing them raw can cause the bag to inflate. Blanch them first!
- Soft Cheeses: Delicate cheeses like brie and ricotta can be crushed and don’t benefit from the lack of oxygen.
- Fresh Mushrooms: Similar to cruciferous veggies, they can ripen and spoil faster when sealed raw. It’s better to cook them first.
- Whole Onions and Garlic: They also release natural gases that can lead to bag failure.
As Chef Antoine Dubois, a proponent of modern preservation techniques, often says, “A chamber sealer in the home kitchen is the bridge between the home cook and the professional. It’s not about fancy tricks; it’s about respecting the ingredient, saving money, and eliminating waste. An affordable model makes that bridge accessible to everyone.”
How to Buy a Chamber Vacuum Sealer Under 300 That Doesn’t Suck
This is the heart of the matter. At this price point, you need to be a smart shopper. Not all budget models are created equal. Here’s what to look for to ensure you get a workhorse, not a dud.
Key Features to Scrutinize
- Pump Type (Dry vs. Oil): At the sub-$300 price point, you will almost exclusively find machines with dry piston pumps. These are maintenance-free and lighter, which is perfect for home use. Oil pumps are more powerful and durable but require regular oil changes and are found in much more expensive, commercial-grade machines. For home use, a quality dry pump is more than sufficient.
- Chamber Size: This dictates the largest bag you can seal. Look at the internal dimensions. Can it fit a standard quart or gallon-sized bag? Can it accommodate the items you plan to seal most often, like a small roast or a few chicken breasts? Don’t just look at the machine’s overall size; check the chamber’s usable space.
- Seal Bar Length and Quality: A longer seal bar (10-12 inches) is more versatile. Check if it has a double-wire seal or an extra-wide single seal. This is a critical feature for long-term reliability.
- Build Quality and Lid: Look for stainless steel construction where possible, but a robust, heavy-duty plastic body is common and acceptable in this range. The most important part is the lid. It should be thick, heavy, and create a perfect seal when closed. A transparent lid is a big plus, as you can watch the process and stop it if your soup starts to bubble over.
- User-Friendly Controls: You don’t need a dozen confusing buttons. Look for simple, adjustable controls for vacuum time and seal time. A clear digital display and a pressure gauge are fantastic bonuses but might be rare in the lowest-priced models.
By focusing on these core features, you can confidently buy a chamber vacuum sealer under 300 that will serve you well for years.
Frequently Asked Questions (FAQ)
Q1: Can you really get a good chamber vacuum sealer for under $300?
Absolutely. While they may not have the raw power or massive capacity of a $1000 commercial unit, models in this price range are more than capable for home use. They provide all the core benefits—sealing liquids, using cheaper bags, and providing a superior seal—making them a fantastic value.
Q2: What is the biggest limitation of a budget chamber sealer?
The most common limitations are a slightly smaller chamber size and a less powerful vacuum pump. This might mean the vacuum cycle takes a few seconds longer, or you can’t seal an entire giant turkey. For 95% of home kitchen tasks, these limitations are perfectly acceptable.
Q3: Do I need special bags for a chamber vacuum sealer?
No, and that’s one of their best features! You use simple, smooth-sided vacuum pouches, which are significantly cheaper than the textured bags required for suction sealers. This saves you a lot of money in the long run.
Q4: Can I use a chamber sealer for sous vide cooking?
Yes, it’s the ideal tool for sous vide. The strong, reliable seal is crucial for long water bath cooks. Plus, the ability to seal liquids means you can easily include marinades, butter, and herbs directly in the bag with your protein.
Q5: How do I maintain a sub-$300 chamber sealer?
Maintenance is minimal for the dry pump models common in this price range. The most important thing is to keep it clean. Wipe down the chamber, gasket, and seal bar after use. Regularly check the rubber gasket around the lid for any cracks or wear and tear.
Your Kitchen, Upgraded
Making the switch to a chamber vacuum sealer is one of the single best investments you can make for your kitchen. It opens up a new world of food preservation, meal prep, and culinary techniques like sous vide. For a long time, this technology felt out of reach for the average home cook. But now, the ability to buy a chamber vacuum sealer under 300 is a reality. By following this guide and knowing what to look for, you can confidently choose a machine that will reduce your food waste, save you money on groceries and supplies, and help you eat better. It’s time to stop throwing away spoiled food and start sealing in the freshness.