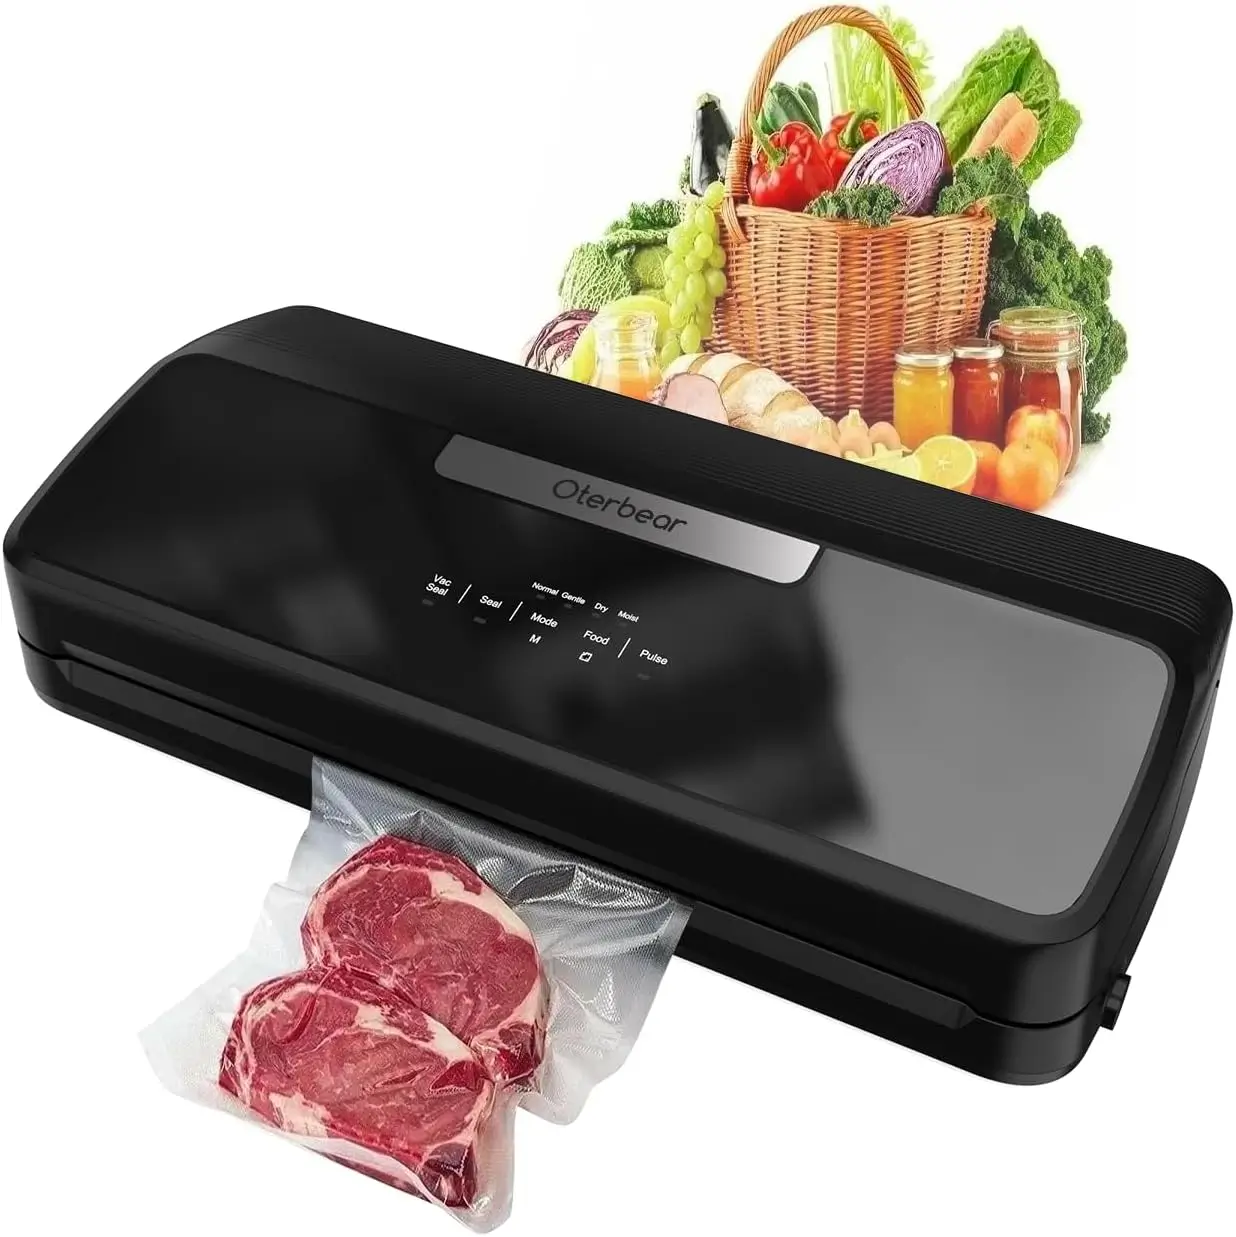
Ever spend your Sunday prepping a week’s worth of beautiful meals, only to find your crisp salads looking sad and your chicken breast sporting a touch of freezer burn by Thursday? A vacuum sealer is a game-changing kitchen gadget that can make your food last up to five times longer, tasting just as fresh as the day you made it, by removing oxygen which causes spoilage and freezer burn. This preservation method is essential for meal preppers to maintain food quality, save money, and reduce waste.
Why a Vacuum Sealer is Your Meal Prep Secret Weapon
So, how does this magic work? It’s surprisingly simple. A vacuum sealer removes the air from a specially designed bag or container before creating an airtight seal. The primary enemy of food freshness is oxygen. It allows for the growth of mold, mildew, and bacteria, and it’s the culprit behind that nasty freezer burn. By removing the oxygen, you essentially press pause on the spoilage process. For explore our vacuum sealers reviews on this site.
The benefits for anyone who meal preps are massive:
- Saves You Serious Cash: No more throwing away wilted greens or spoiled leftovers. You’ll reduce food waste dramatically, which means your grocery budget goes a whole lot further.
- Keeps Food Fresher, Longer: We’re talking days, weeks, and even months of extended freshness. Your Monday chicken is still perfect for Friday’s lunch. Your bulk-bought meats stay pristine in the freezer for the better part of a year.
- Locks in Flavor and Nutrients: When you seal food, you’re also sealing in its moisture, flavor, and nutrients. Marinated meats become even more flavorful because the vacuum process helps open the pores of the meat, allowing the marinade to penetrate deeper.
- Banish Freezer Burn for Good: Freezer burn happens when air comes into contact with the moisture on your food’s surface, causing ice crystals to form and dehydrate it. An airtight vacuum seal makes this impossible.
- Supercharge Your Sous Vide Cooking: If you’re into sous vide, a vacuum sealer is non-negotiable. It ensures a perfect seal for even cooking and prevents your food from floating in the water bath.
While professional-grade models can be an investment, excellent entry-level options are widely available. A common starting point for many is to buy vacuum sealer walmart, where you can find a range of models to fit your budget and begin your journey into superior food preservation.
What Are the Main Types of Vacuum Sealers?
When you start shopping, you’ll mainly see two types. Don’t get overwhelmed; the choice is usually pretty straightforward for home use.
External (or Edge) Sealers
This is the most common type you’ll find in home kitchens. You place the open end of a textured bag into the machine’s trough, close the lid, and it sucks the air out before heat-sealing the edge.
- Pros: Generally more affordable, compact, and easier to store. Perfect for most meal prep tasks like sealing portions of meat, vegetables, and dry goods.
- Cons: Can struggle with very moist foods or liquids, as the suction can pull liquid into the machine. They also require special textured bags to create air channels for the suction to work.
Chamber Sealers
These are the heavy-duty, professional-grade machines. You place the entire bag inside a chamber, close the lid, and the machine removes the air from the entire chamber at once. Because the air pressure is equalized inside and outside the bag, liquids stay put.
- Pros: Can seal liquids like soups and stews without any issue. They are faster for sealing multiple items and can use much cheaper, smooth-sided bags.
- Cons: They are significantly larger, heavier, and more expensive. This is more of an investment for a serious home chef, a hunter, or someone who preserves a large amount of food from their garden.
For most people looking to buy a vacuum sealer for meal prep, an external sealer is the perfect place to start.
Your First Sealing Session: A Step-by-Step Guide
Ready to give it a whirl? Using a vacuum sealer is incredibly easy. Here’s a basic rundown:
- Prep Your Food: Portion out your grilled chicken, chop your veggies, or measure your rice. Make sure any moist food has been patted dry.
- Choose Your Bag: Use a roll to create a custom-sized bag or grab a pre-sized one. Always leave at least three inches of empty space at the top for a good seal.
- Place and Lock: Open your sealer and place the open end of the bag into the vacuum channel or drip tray, as directed by the manufacturer. Close the lid and lock it firmly in place.
- Seal the Deal: Press the “Vacuum & Seal” button. The machine will whir to life, sucking the air out until the bag is tight against your food. Then, the heat bar will activate, melting the bag to create a strong, permanent seal.
- Label and Store: Once it’s done, release the lid. It’s a great habit to write the contents and the date on the bag with a permanent marker before storing it in the fridge, freezer, or pantry.
Pro Tips to Seal Like You’ve Been Doing It for Years
After a few sessions, you’ll get the hang of it. But here are a few tips I’ve learned over the years to take your sealing game to the next level:
- Pre-Freeze Liquids: Want to seal soup or a saucy dish with an external sealer? Pour it into a container, freeze it solid, then pop the frozen block into a bag and seal it. No mess!
- The Paper Towel Trick: For particularly moist items like raw meat or fish, fold a small paper towel and place it inside the bag, between the food and where the seal will be. It will catch any excess moisture without compromising the seal.
- Don’t Crush Your Delicates: Sealing things like bread, chips, or delicate pastries? Use the “pulse” function if your machine has one, which gives you manual control over the suction. If not, hit the “Seal” button manually just before it starts to crush your food.
- Double Seal for Security: For long-term freezer storage or sous vide, I always recommend giving your bag a second seal about a quarter-inch away from the first one. It’s an extra layer of protection against any potential leaks.
|
Our Picks for the Best Food Vacuum Cealer in 2026
As an Amazon Associate, we earn from qualifying purchases.
|
||
| Num | Product | Action |
|---|---|---|
| 1 | Nesco Deluxe Food VS-12 Vacuum Sealer, 130 Watts, Kit Bags & Viewing Lid, Compact, Silver |

|
| 2 | SEATAO VH5188 Automatic Vacuum Sealer Machine, 90kPa Multifunction Commercial Vacuum Food Sealer For Food Preservation, Dry & Moist & Food & Extended Modes, LED lights, Double Seal |
|
| 3 | Vacuum Sealer Machine Powerful 90Kpa Precision 6-in-1 Compact Food Preservation System with Cutter, 2 Bag Rolls & 5 Pre-cut Bags, Widened 12mm Sealing Strip, Dry&Moist Modes (Silver) |
|
| 4 | FoodSaver V4400 2-in-1 Vacuum Sealer Machine with Automatic Vacuum Sealer Bag Detection and Starter Kit |
|
| 5 | FoodSaver Vacuum Sealer Machine, Automatic Bag Detection, Sous Vide Friendly, with sealer bags, roll, handheld vacuum sealer, black |
|
| 6 | Vakumar Liquid Vacuum Sealer Machine, 90Kpa Vacuum Sealer Machine Preservation Dry/Moist/Liquid Modes, LED Indicator Light, Handle Locked Design, Built-in Cutter and Bag Storage, Removable Drip Tray |
|
| 7 | Chef Preserve Compact Vacuum Sealer for Food (Vacuum Sealer Machine + 30 Reusable Vacuum Bags) Powerful Handheld Vacuum Sealer Machine, Seal Meal Saver, Portable Food Sealer |
|
| 8 | FoodSaver Compact Vacuum Sealer Machine with Airtight Bags and Roll - Ideal for Sous Vide and Airtight Food Storage, White |
|
| 9 | Anova Culinary Precision Vacuum Sealer Pro, Includes Large Bag Roll (19ft), Wet & Dry Dual Food Vacuum Sealer Machine for Sous Vide and Long-Term Storage, 2-Year Warranty |
|
| 10 | NutriChef Automatic Vacuum Air Sealing System for Food Preservation with Starter Kit, Compact Design, Lab Tested, Dry & Moist Food Modes with Led Indicator Lights, Black |
|
The Dos and Don’ts: What Should You Vacuum Seal?
While a vacuum sealer is incredibly versatile, it’s not meant for everything. Knowing what to seal and what to avoid is key to getting the best results.
The A-List: Foods That Love to be Sealed
- Meats and Fish: Raw or cooked, this is a vacuum sealer’s bread and butter.
- Hard Cheeses: Prevents mold and keeps them from drying out.
- Hard Fruits and Vegetables: Things like carrots, beans, and sliced apples do wonderfully.
- Dry Goods: Coffee beans, pasta, rice, and flour will be protected from pests and moisture.
- Pre-made Meals: Casseroles, curries, and portioned lunches are perfect for sealing.
The No-Fly Zone: Foods to Avoid or Prep First
- Cruciferous Vegetables: Raw broccoli, cauliflower, cabbage, and Brussels sprouts emit a gas as they ripen that can cause the bag to expand and the food to spoil. You must blanch them first (a quick boil followed by an ice bath) to stop this process before sealing.
- Soft Cheeses: Cheeses like brie, ricotta, and blue cheese don’t do well, as their texture and mold cultures can be negatively affected.
- Whole Mushrooms: They ripen quickly and can spoil inside the bag. It’s better to cook them first.
- Fresh Garlic and Onions: When raw and deprived of oxygen, they can produce the bacteria that causes botulism. It is much safer to seal them cooked or dehydrated.
Dr. Helena Vance, a food preservation specialist, often says, “Oxygen is the enemy of freshness. By removing it, a vacuum sealer doesn’t just preserve food; it preserves the effort, money, and love you put into preparing it.”
How to Buy a Vacuum Sealer for Meal Prep That’s Right for You
Okay, you’re convinced. But with so many models out there, how do you choose? Focus on these key factors.
Size and Storage
Where will you keep it? Some models are sleek and slim, designed to be stored vertically to save counter space. Others are bulkier. Think about your kitchen’s layout before you buy.
Sealing Power and Speed
This is often measured in inches of mercury (Hg). A higher number means stronger suction, which is better for removing as much air as possible. Also, consider the cycle time if you plan on sealing many bags in one go.
Key Features to Look For
- Moist/Dry Food Settings: This is a crucial feature. It adjusts the sealing time and suction level to prevent liquids from being drawn into the machine.
- Built-in Bag Cutter and Roll Storage: Immensely convenient. This allows you to create custom-sized bags from a roll stored right inside the unit.
- Accessory Port: This allows you to use hoses to seal special canisters and containers, which are great for marinating or storing delicate items.
- Removable Drip Tray: This makes cleanup so much easier, especially if some moisture does get pulled out of the bag. Look for one that’s dishwasher-safe.
Your Budget
You can find a solid, reliable vacuum sealer for under $100. More expensive models ($150-$250) will offer more powerful motors, stainless steel construction, and more advanced features. Decide what features are must-haves for your meal prep style and choose accordingly.
Frequently Asked Questions
How long does vacuum-sealed food last in the freezer?
Properly vacuum-sealed food can last for 2-3 years in the freezer without any loss of quality or freezer burn, compared to just 6-12 months using traditional methods.
Can I vacuum seal liquids like soups and stews?
Yes, but it’s tricky with an external sealer. The best method is to freeze the liquid in a container first, then seal the frozen block in a bag. A chamber sealer can handle liquids without any pre-freezing.
Are vacuum sealer bags reusable?
It depends. If you’ve used them for raw meat, fish, or greasy foods, you should discard them for food safety reasons. If they held dry goods, you can wash them thoroughly and reuse them, provided you cut off the old seal and have enough bag left to create a new one.
Do I need a special type of vacuum sealer for sous vide?
No, any standard vacuum sealer will work perfectly for sous vide cooking. The most important thing is ensuring you get a strong, reliable seal that won’t leak in the water bath. A double seal is recommended.
Will vacuum sealing crush delicate foods like bread or chips?
It can if you use the full automatic cycle. To avoid this, look for a machine with a “pulse” mode for manual control, or simply press the “Seal” button before the vacuum gets too strong to stop the suction and seal the bag.
Your Journey to Fresher, Easier Meals Starts Now
Making the decision to buy a vacuum sealer for meal prep is an investment in your health, your wallet, and your valuable time. It bridges the gap between your Sunday cooking session and your delicious, fresh-tasting weekday meals. You’ll unlock a new level of efficiency in the kitchen, reduce waste, and wonder how you ever managed without one. So, take a look at your needs, consider the features that matter most to you, and get ready to revolutionize your meal prep routine for good.
Frequently Asked Questions
How long does vacuum-sealed food last in the freezer?
Properly vacuum-sealed food can last for 2-3 years in the freezer without any loss of quality or freezer burn. This is significantly longer than the 6-12 months typically achieved with traditional storage methods, offering extended freshness.
Can I vacuum seal liquids like soups and stews?
Yes, you can vacuum seal liquids, but it requires specific techniques. For external sealers, it's best to pre-freeze the liquid in a container first, then seal the frozen block in a bag. Chamber sealers, however, can handle liquids directly without pre-freezing.
Are vacuum sealer bags reusable for food storage?
Vacuum sealer bags can be reusable under certain conditions. If they contained raw meat, fish, or greasy foods, they should be discarded for food safety. However, bags used for dry goods can be thoroughly washed and reused, provided the old seal is cut off and enough bag remains for a new seal.
Do I need a special type of vacuum sealer for sous vide cooking?
No, any standard vacuum sealer will work perfectly for sous vide cooking. The most important factor is ensuring a strong, reliable seal that will not leak when submerged in the water bath. A double seal is often recommended for extra security.
Will vacuum sealing crush delicate foods such as bread or chips?
Vacuum sealing can crush delicate foods if the full automatic cycle is used. To prevent this, look for a machine with a 'pulse' mode, which allows for manual control over the suction. Alternatively, you can manually press the 'Seal' button before the vacuum becomes too strong to stop the suction and seal the bag.
How to Use a Vacuum Sealer for Meal Prep
Using a vacuum sealer is an easy process that significantly extends the freshness of your meal-prepped foods. Follow these steps for an effective sealing session.
Portion out your food items like grilled chicken, chopped vegetables, or measured rice. Ensure any moist foods are patted dry to prevent issues during the sealing process.
Select a pre-sized bag or create a custom one from a roll, leaving at least three inches of empty space at the top. Open your sealer and place the open end of the bag into the vacuum channel or drip tray as per manufacturer instructions.
Close the lid and lock it firmly in place. Press the 'Vacuum & Seal' button; the machine will remove air until the bag is tight, then activate the heat bar to create a permanent seal.
Once the sealing process is complete, release the lid. Use a permanent marker to write the contents and date on the bag before storing it in the refrigerator, freezer, or pantry for optimal organization and tracking.
Get our weekly buyer guide
Practical specs, not advice. Unsubscribe anytime.
This kitchen gadget has completely transformed my meal prep Sundays. I used to throw out so much food because it would spoil before I could eat it all. Now, by removing the oxygen, everything stays fresh for so much longer. It’s amazing how much money I’m saving and how much less food I’m wasting. Highly recommend for anyone serious about meal prepping.
I got a vacuum sealer after reading about how it helps with meal prep, especially for extending the life of cooked meals. While it definitely works for things like soups and stews, I’ve found it a bit fiddly with more delicate items. My crisp salads still get a little squished sometimes, even with the pulse function. It’s good, but not perfect for everything.
I’ve been on the fence about a vacuum sealer for a while, but the point about salads staying crisp really sold me. I’m tired of my greens wilting after just a couple of days, even in airtight containers. My new sealer has made a noticeable difference in how long my produce stays fresh, which is a huge win for my weekly meal prep routine. Definitely worth the investment.
I used to dread finding my carefully prepped chicken breasts covered in freezer burn by mid-week. This post really highlighted how a vacuum sealer tackles that problem head-on. Since getting one, my meal prep lasts so much longer, and everything tastes fresh, not like it’s been in the freezer for ages. It’s truly a game-changer for saving money and reducing food waste.